

Your First AI-Assisted Findings-Only Merge
This guide walks you through your first AI-assisted merge — dictating findings into the PowerScribe findings-only panel and using Presto to route them into the correct template fields and generate an impression. By the end, you’ll have a completed report with structured findings and an auto-generated impression.
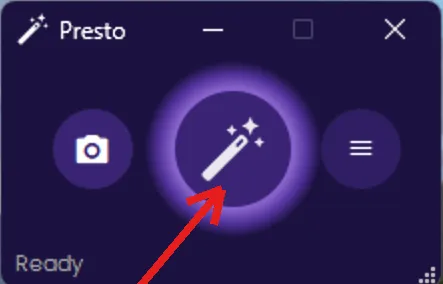
Step 1: Confirm Presto is connected to PowerScribe
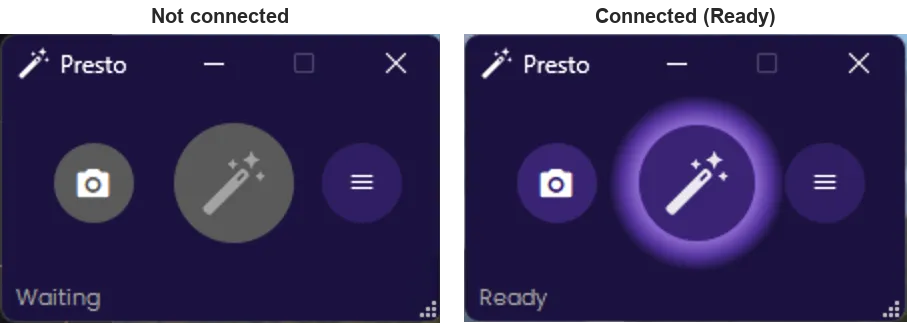
Section titled “Step 1: Confirm Presto is connected to PowerScribe”With Presto open and PowerScribe 360 or PowerScribe One running, look at the Presto widget. When Presto is connected and ready, the buttons light up in purple and the status line in the bottom-left reads “Ready”.
If Presto isn’t connected — or you don’t have a report open — the buttons stay grayed out and the status shows “Waiting”. Open a report (next step) to bring Presto to the ready state.
Step 2: Open a test report
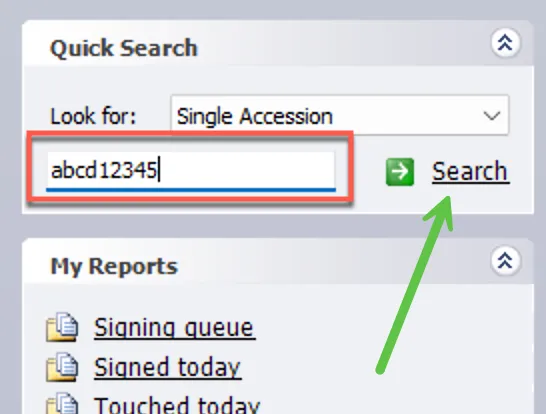
Section titled “Step 2: Open a test report”To create a test report, go to the Quick Search panel on the left side of PowerScribe 360. Enter a test accession number — any combination of letters and numbers will work (e.g., abcd12345) — and click Search.
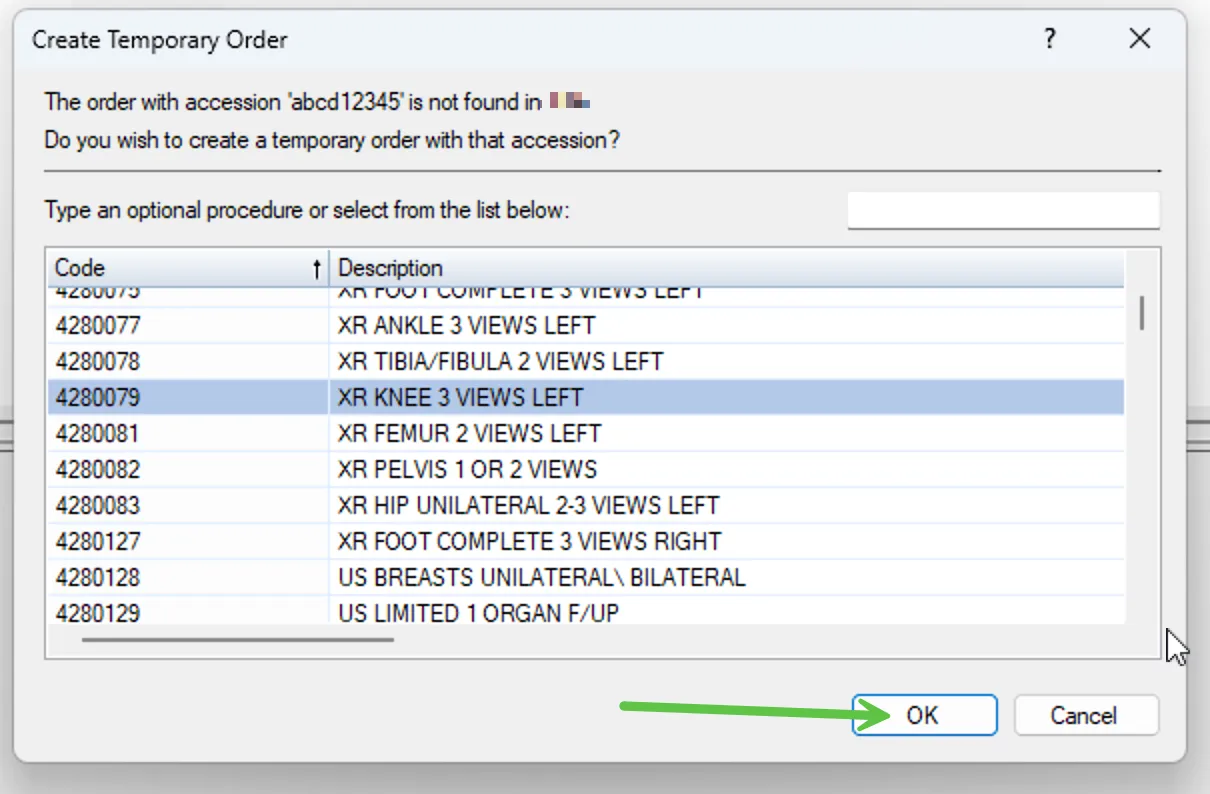
A Create Temporary Order dialog will appear. Select any procedure code from the list and click OK. A blank draft report will open in PowerScribe.
Step 3: Open a structured template
Section titled “Step 3: Open a structured template”Choose a template for your test. Pick one with several fields so you can see how Presto routes findings into the right places. Any structured template will work — Presto handles templates with or without fields, structured or prose.
In this example, we’re using a CT Abdomen and Pelvis template.

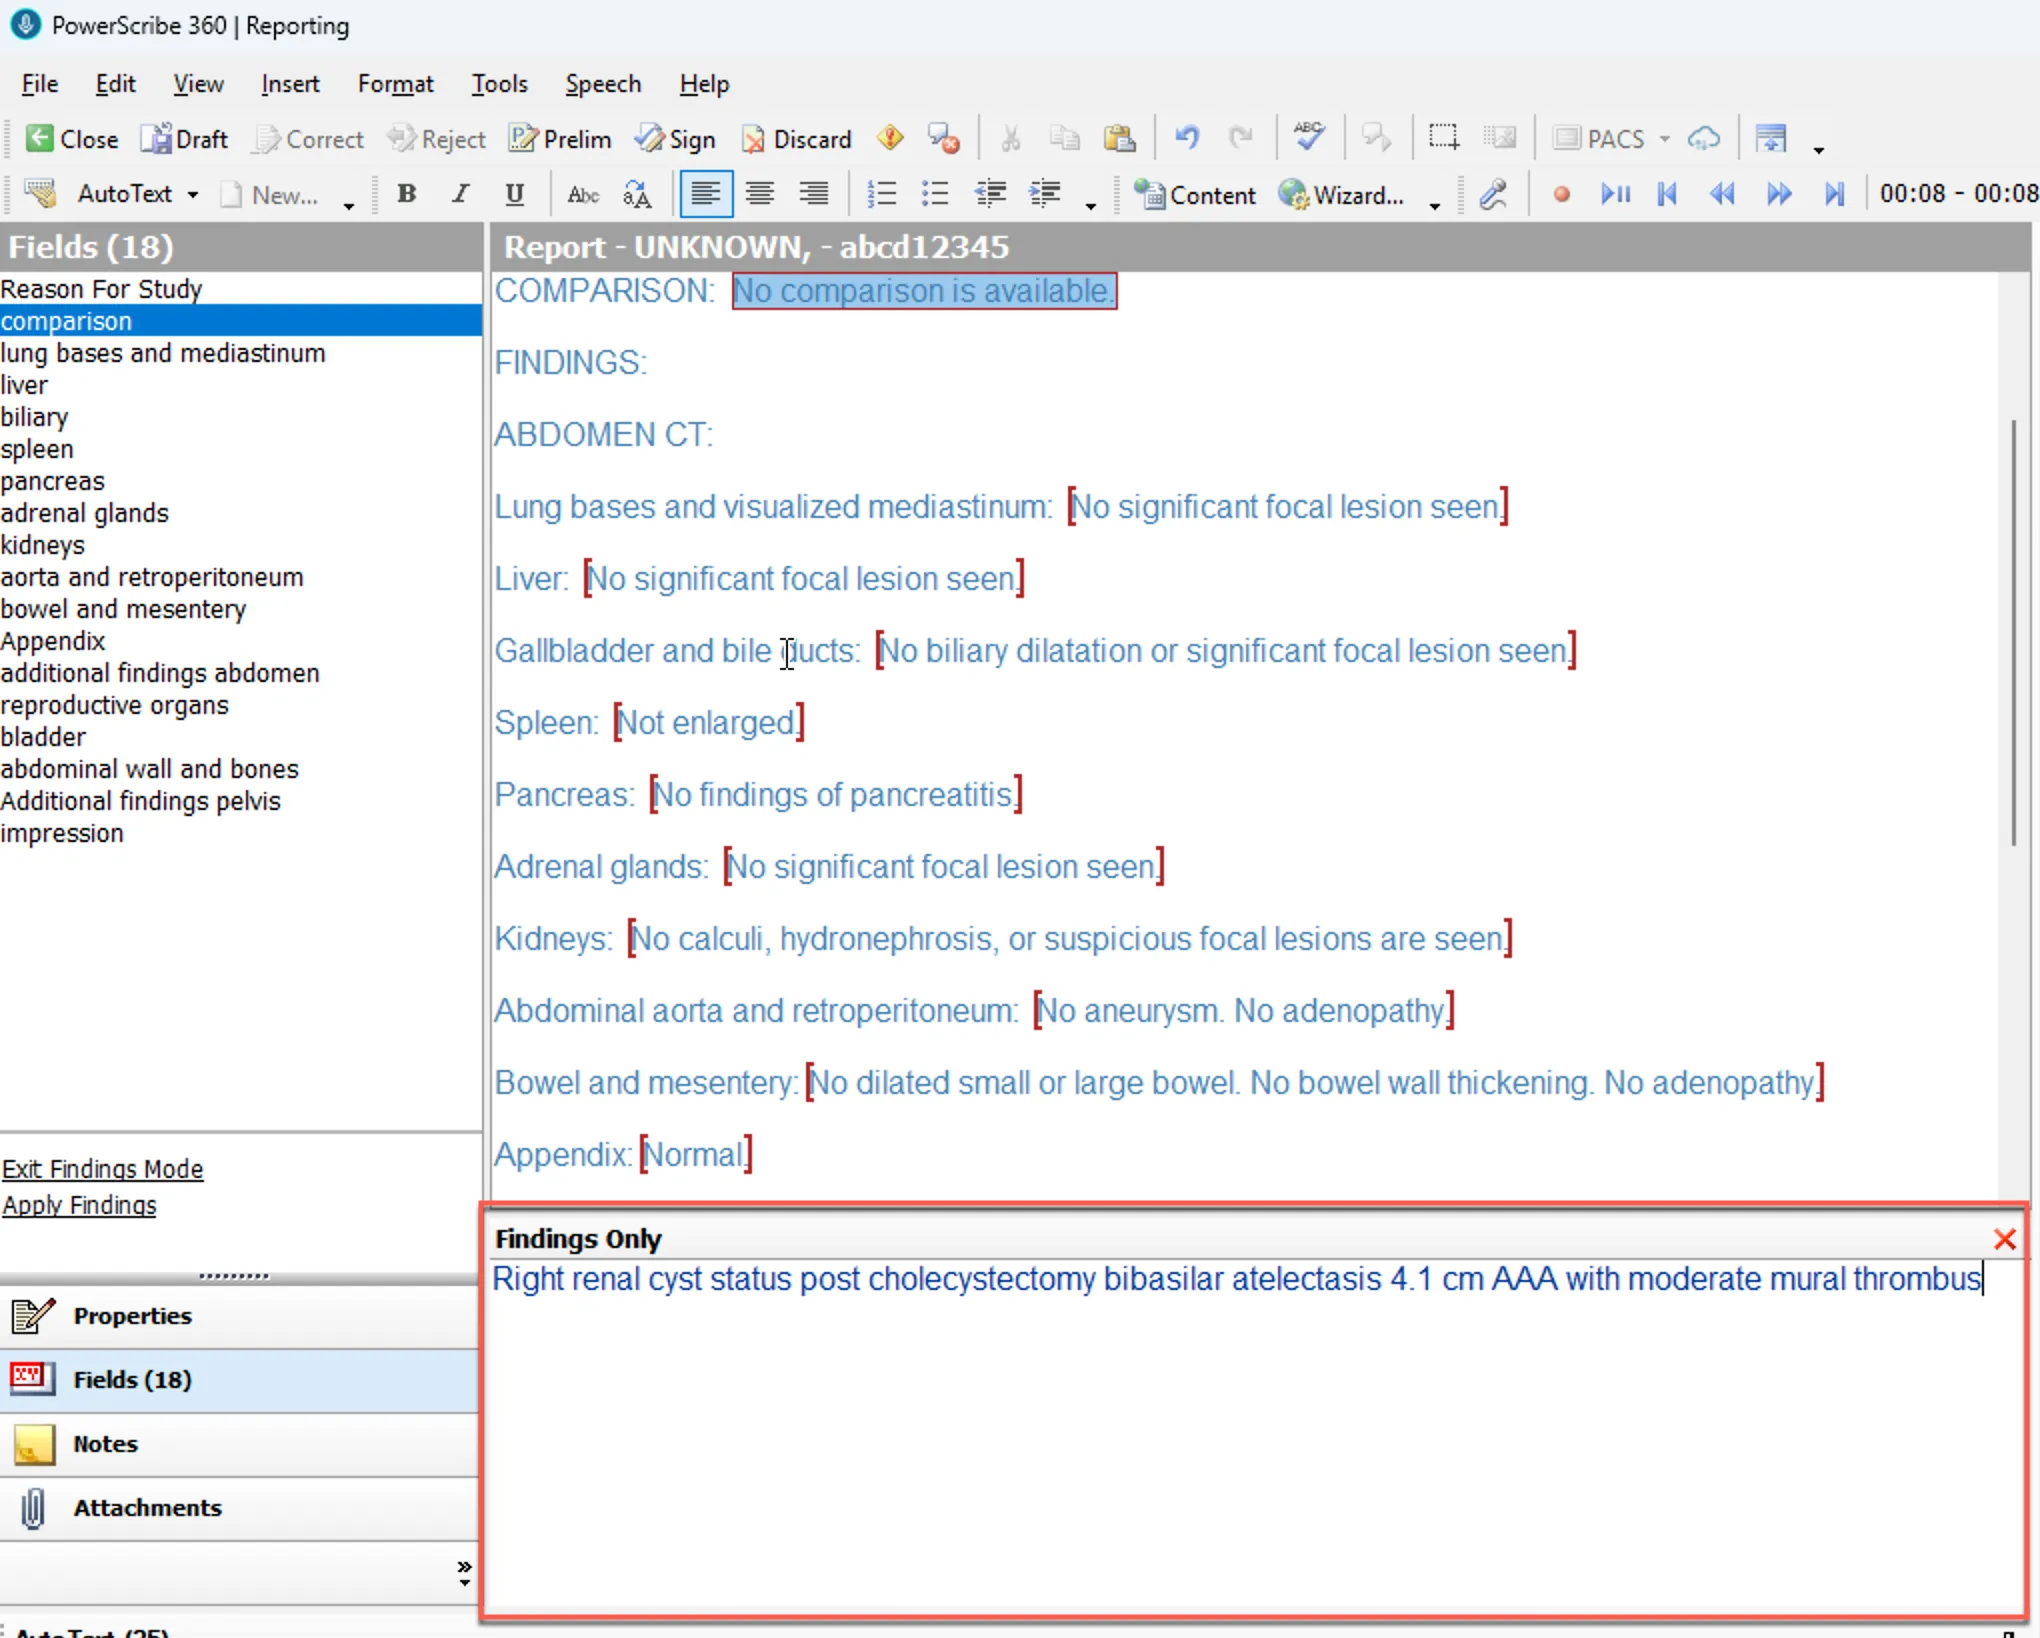
Step 4: Enter Findings Mode
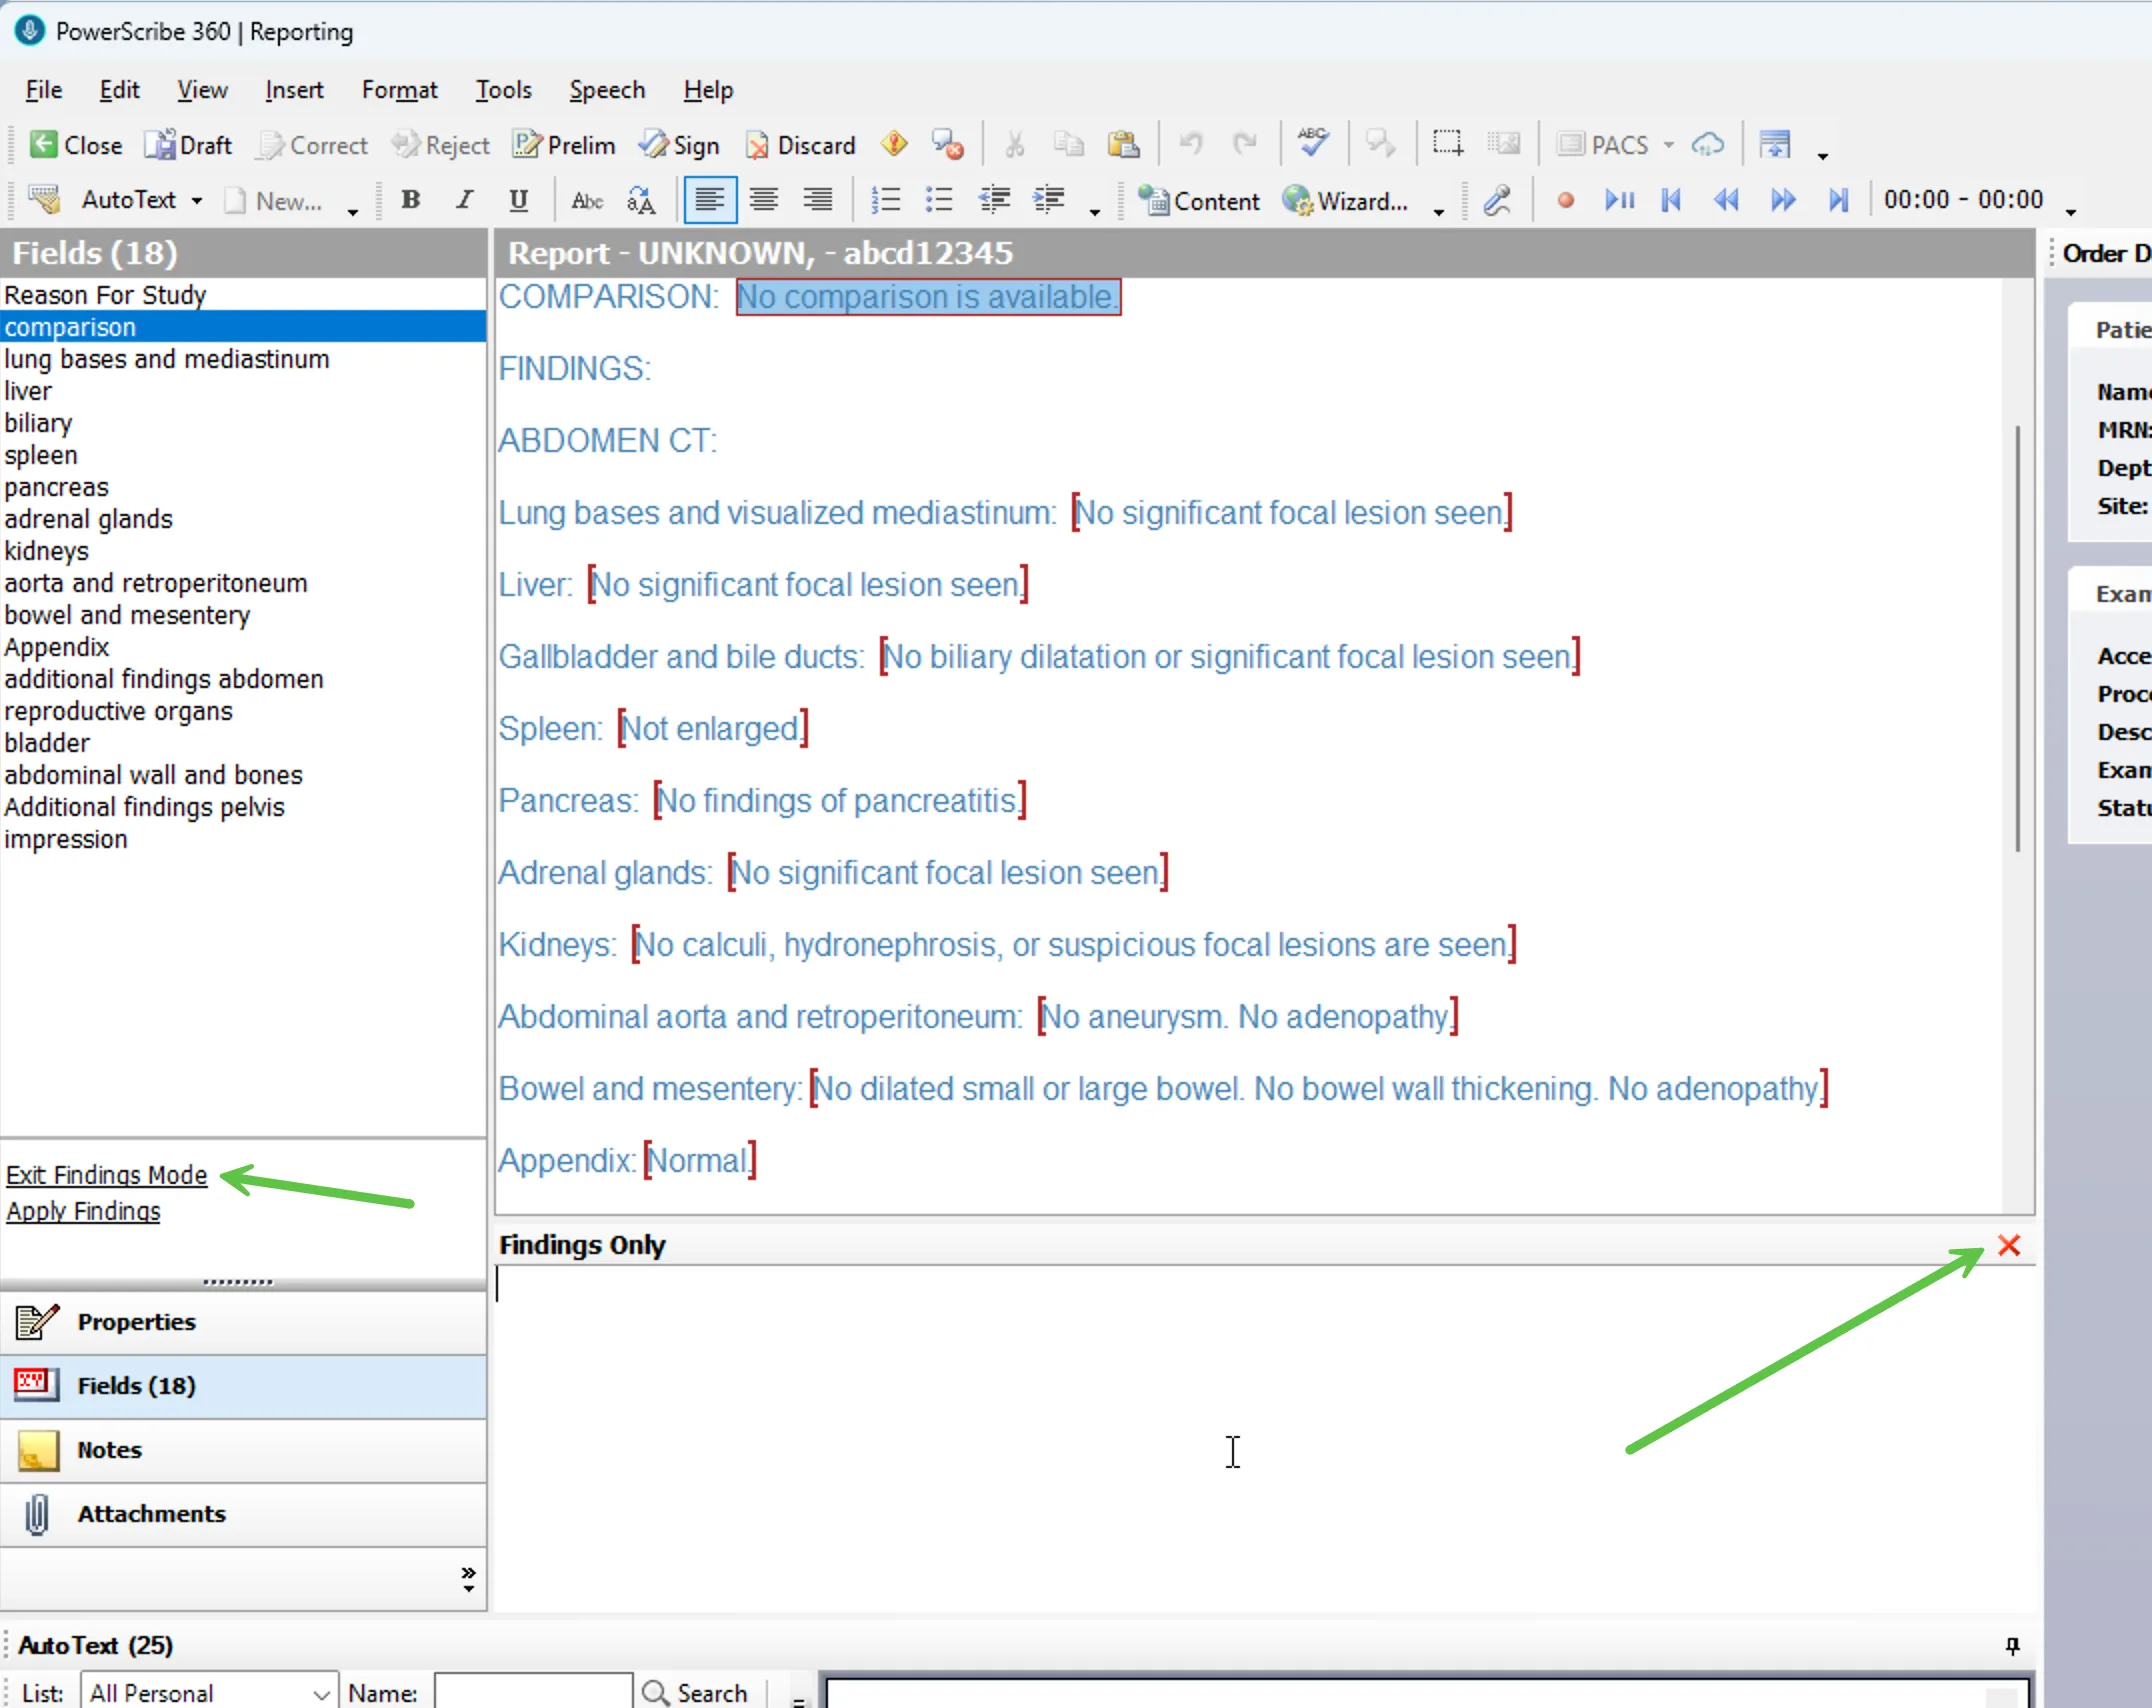
Section titled “Step 4: Enter Findings Mode”Click the Fields tab on the left side of PowerScribe. At the bottom of the fields list, click Enter Findings Mode.
A Findings Only panel will appear below the report. This is where you’ll dictate or type the findings you want Presto to merge.
Step 5: Dictate or type your findings
Section titled “Step 5: Dictate or type your findings”Dictate or type your findings into the Findings Only panel. You don’t need any special formatting — no bullet points, punctuation, or line breaks required. Just describe what you see, the way you normally would.
Both sentence-form prose and terse keyword-style dictation work.
For this example:
Right renal cyst status post cholecystectomy bibasilar atelectasis 4.1 cm AAA with moderate mural thrombus
Step 6: Merge with Presto
Section titled “Step 6: Merge with Presto”Click the merge button — the large circular button in the center of the Presto widget, marked with the Presto wand icon. You can also press Ctrl+M.
The status bar in the Presto widget will update as the merge progresses: Extracting → Merging → Applying. This typically takes a few seconds. When complete, the status bar returns to Ready.
Step 7: Review the results
Section titled “Step 7: Review the results”After the merge, your PowerScribe report will have:
- Findings routed into the correct template fields — Presto reads your template structure and places each finding where it belongs.
- An automatically generated impression — based on your findings and template context.
- Merged text highlighted in bold — so you can see exactly what Presto placed. (This can be turned off in the web portal settings.)
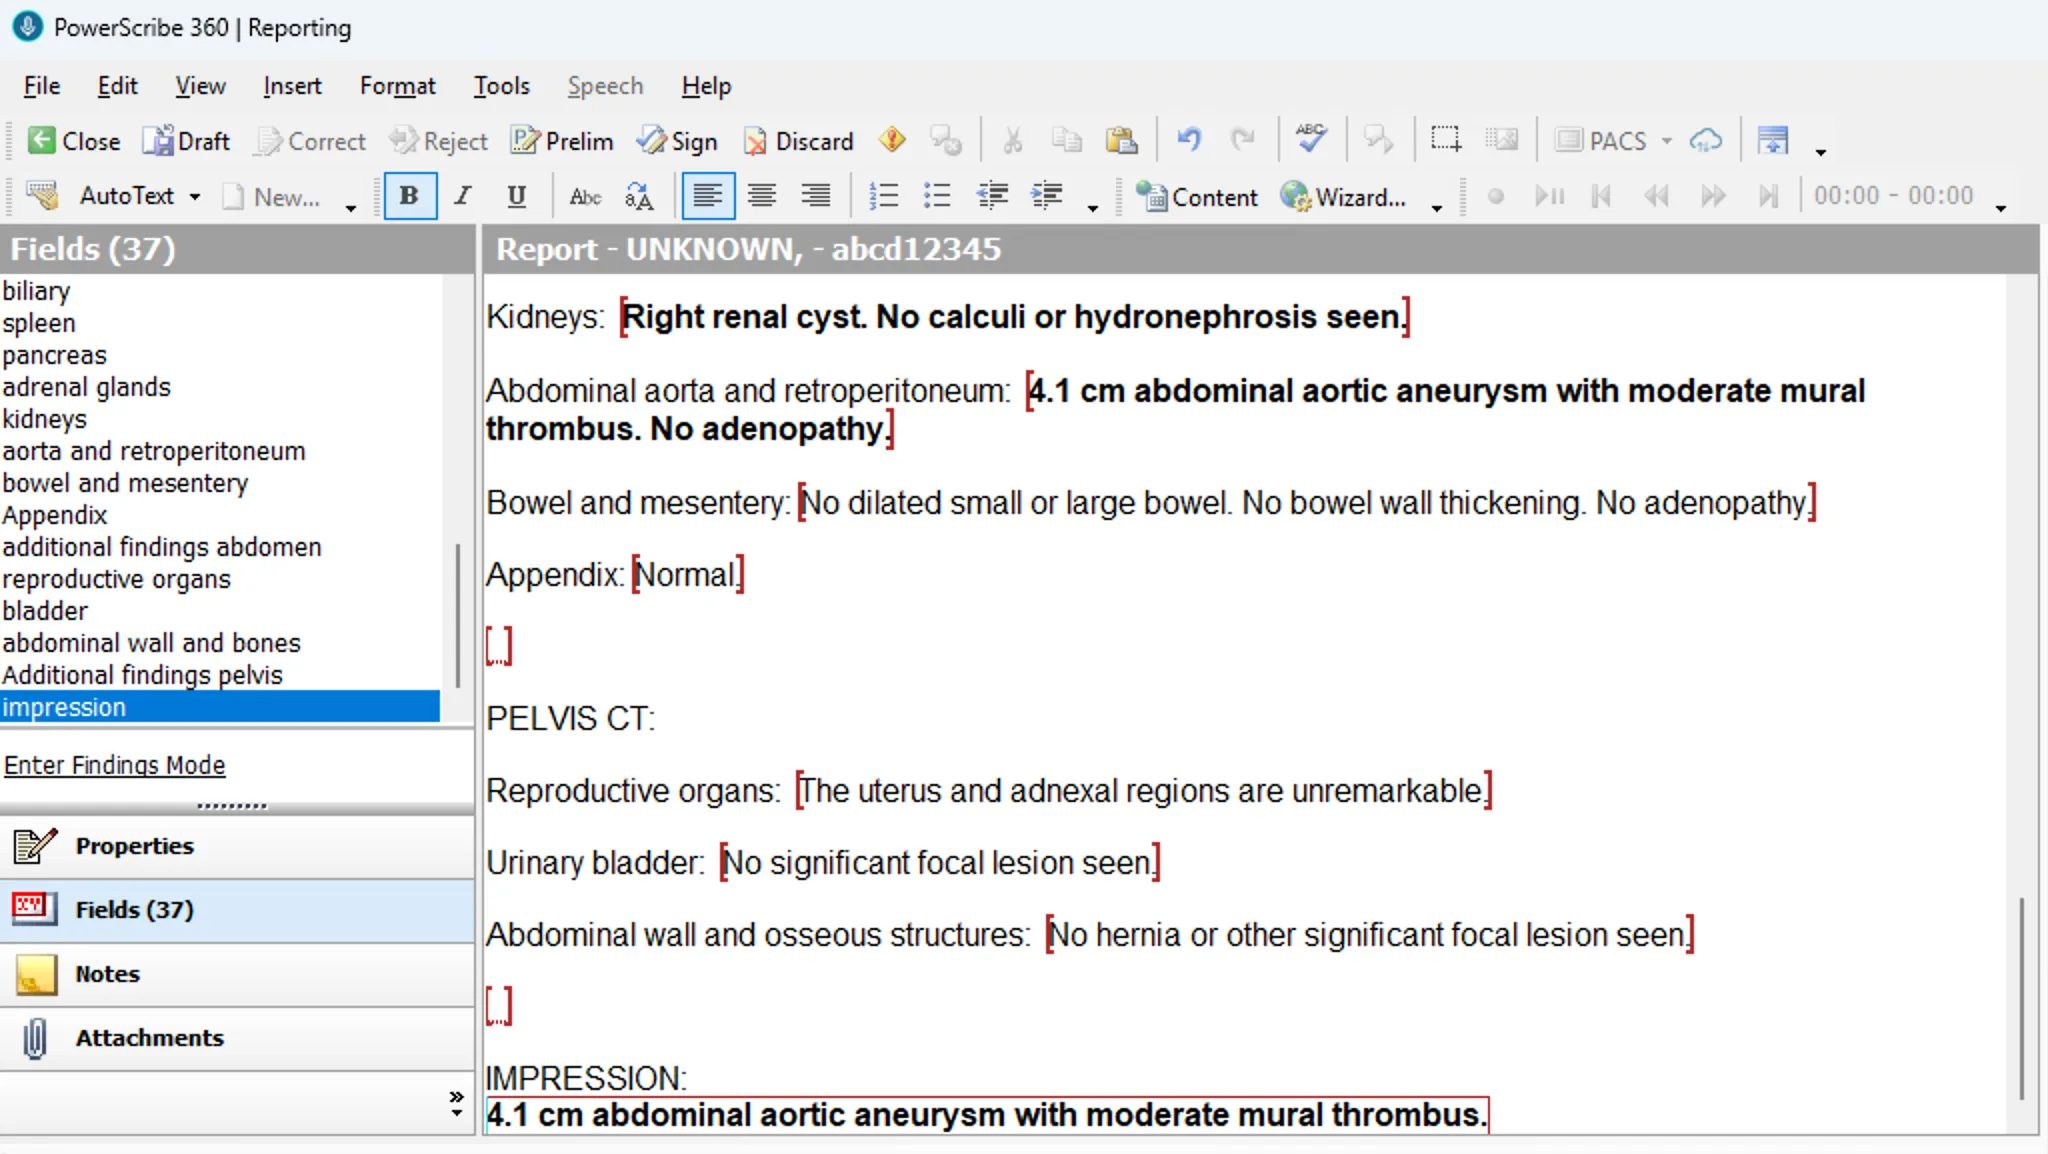
All fields remain fully editable after the merge. You can tab through fields, use picklists, dictate corrections, and edit freely — your normal PowerScribe workflow is unchanged.
Auto Merge
Section titled “Auto Merge”Click the ≡ button on the right side of the widget to open the menu, where you’ll find the Auto Merge toggle. When enabled, Presto merges findings into your report as soon as they arrive, removing the manual merge click.
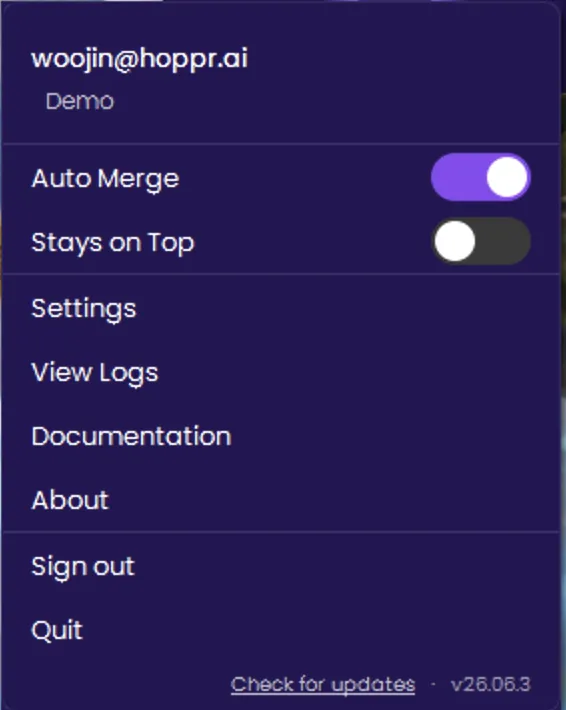
When it fires:
- AI-generated findings update for the current study (e.g., a vision-language model populates the findings panel).
- OCR finishes extracting findings from a scanned report. (Added in 26.04.5.)
Prerequisites: Enterprise deployment where AI findings are flowing — VLM, OCR, or another inference source. Auto Merge does not apply to the findings-only workflow described above.
Enable it: flip the Auto Merge toggle in the widget menu. The setting is server-managed and follows you to any workstation where you sign in.