

Setting Up Microphone Buttons & Keyboard Shortcuts
Configure microphone button actions and keyboard shortcuts at app.presto.run. Settings follow your account — they apply on any workstation where you sign in.
Microphone Buttons
Section titled “Microphone Buttons”Step 1: Open the Microphone Buttons page
Section titled “Step 1: Open the Microphone Buttons page”Sign in to app.presto.run and select Microphone Buttons from the sidebar.
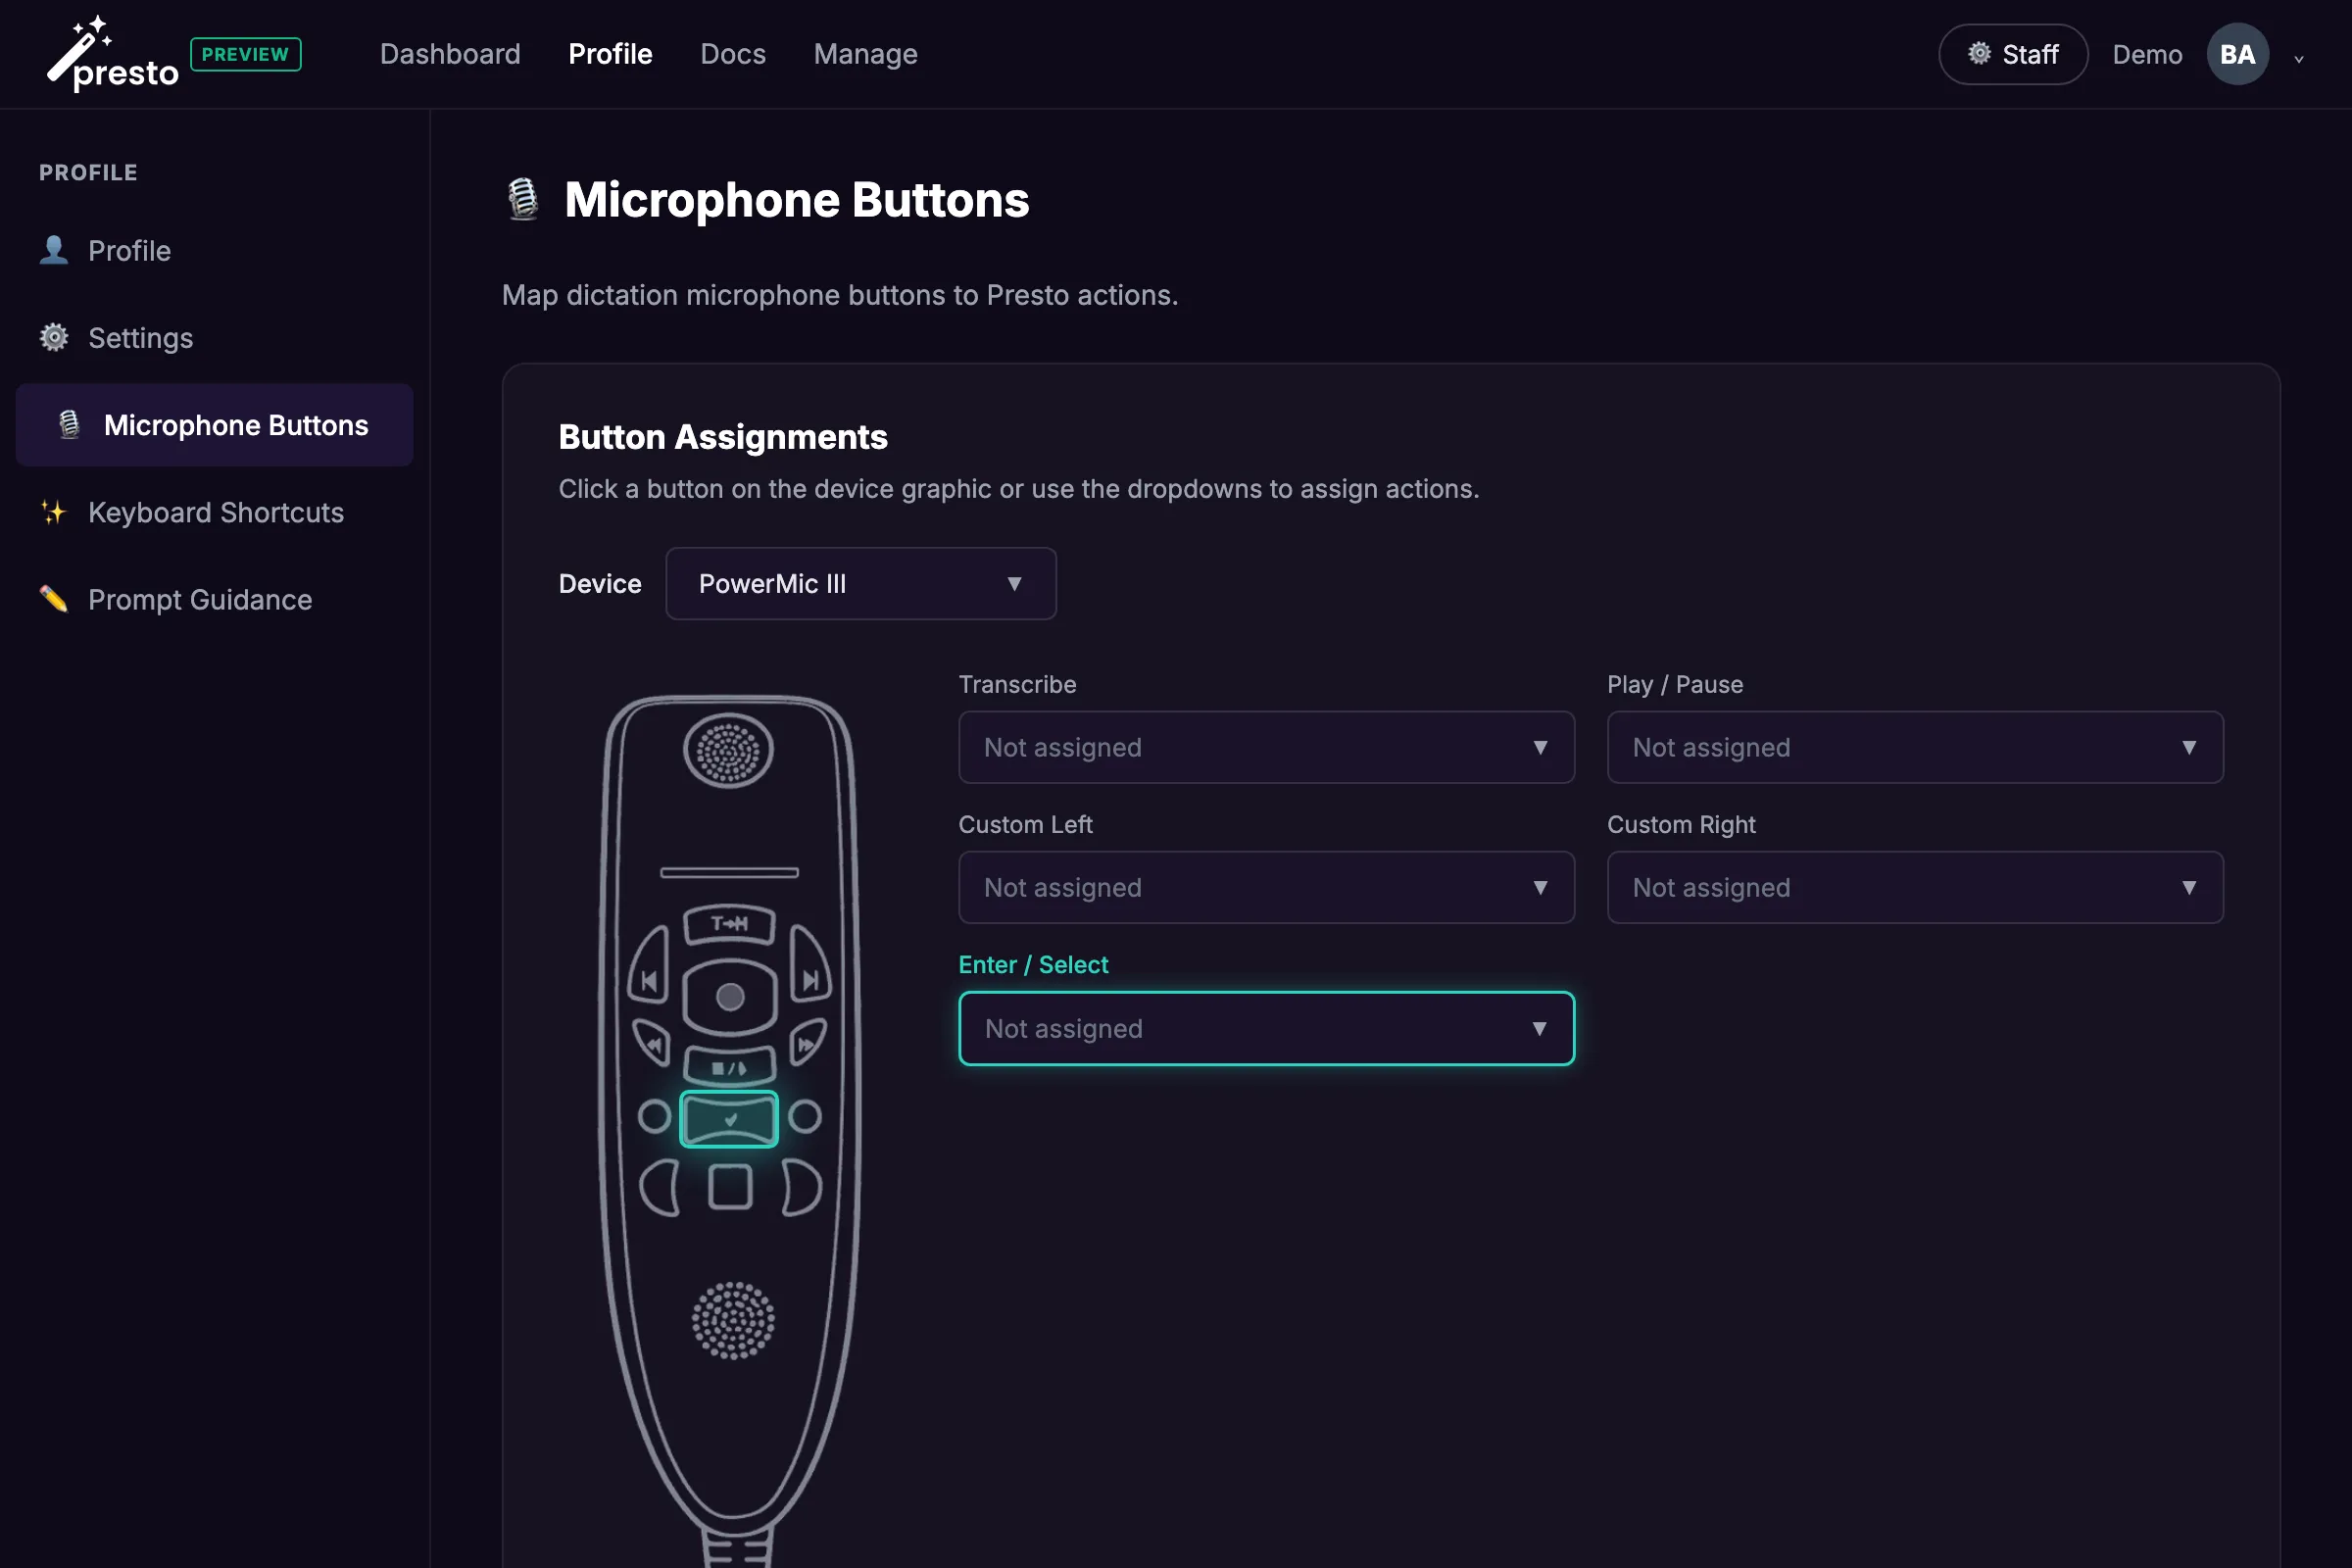
Step 2: Choose your device
Section titled “Step 2: Choose your device”Select your microphone model from the Device dropdown. Only assignable buttons are shown — transport buttons used by PowerScribe (Record, Rewind, Forward) are reserved and cannot be reassigned.
| Device | Assignable Buttons |
|---|---|
| PowerMic II / III | Transcribe, Play/Stop, Custom Left, Custom Right, Enter/Select |
| PowerMic 4 | Enter/Select, Play/Pause, Function 1–4, Command |
| SpeechMike Premium | Instructions, End of Letter/Priority, Insert/Overwrite, Play/Pause, Function 1–4 |
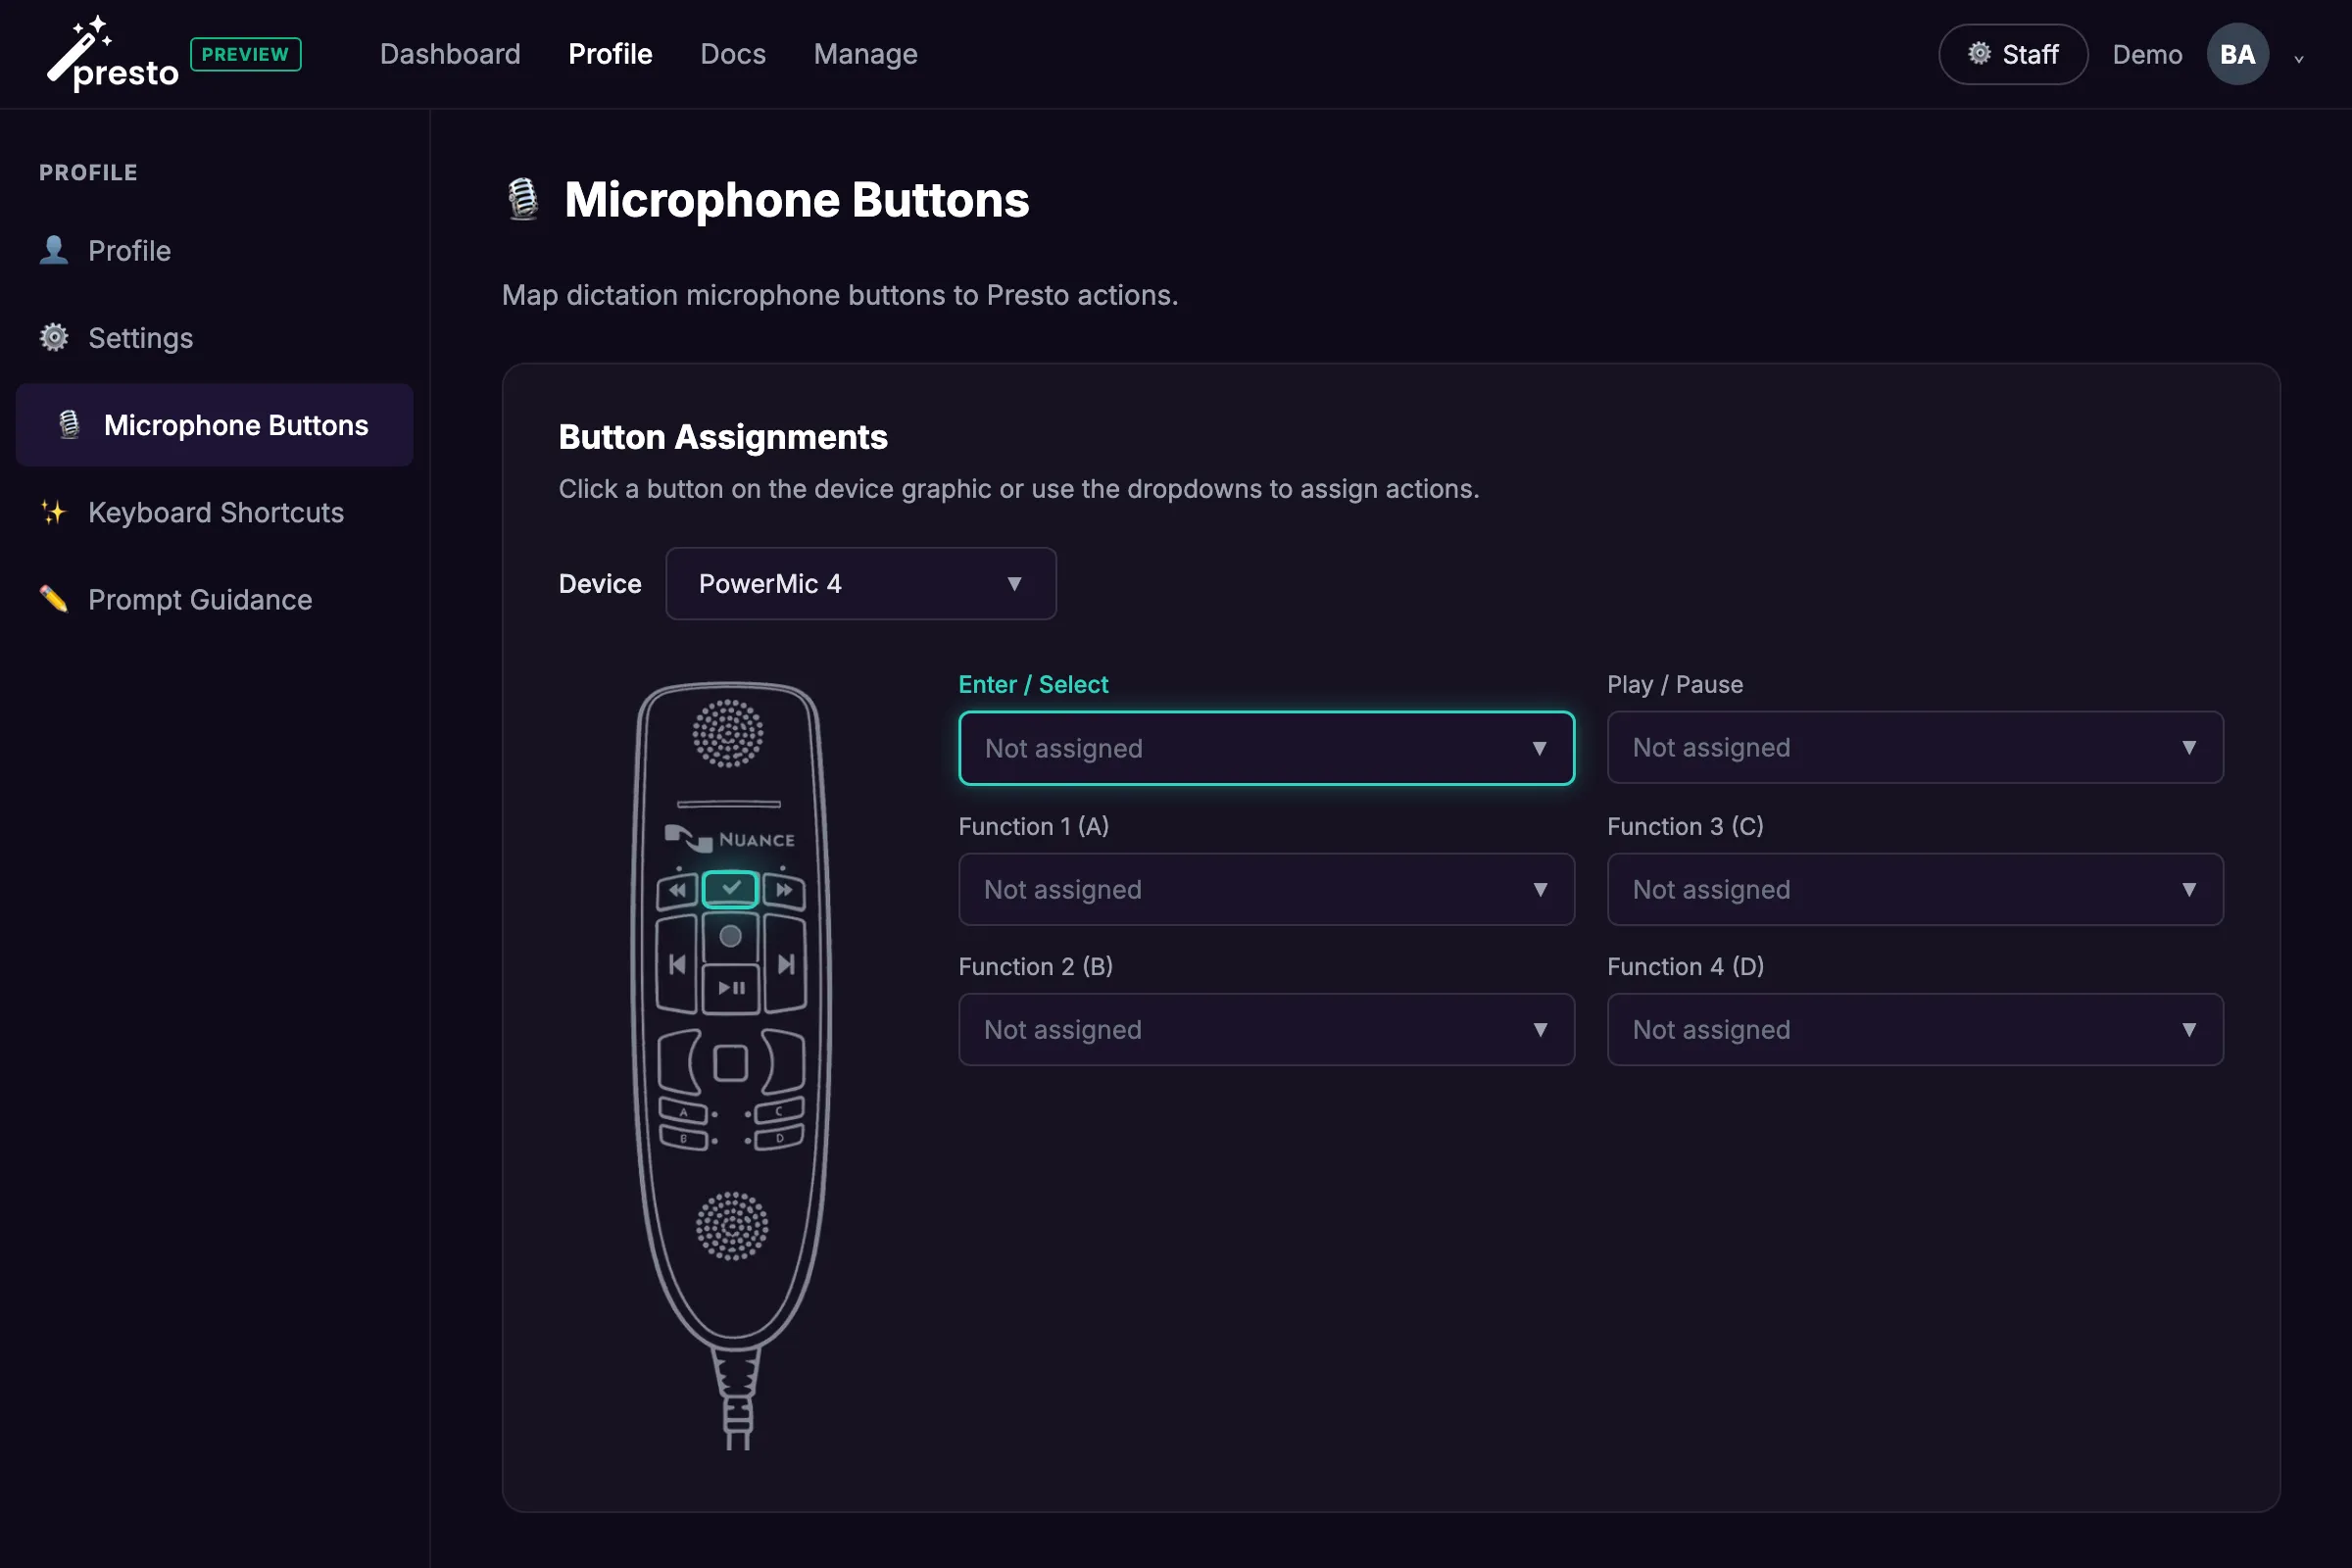
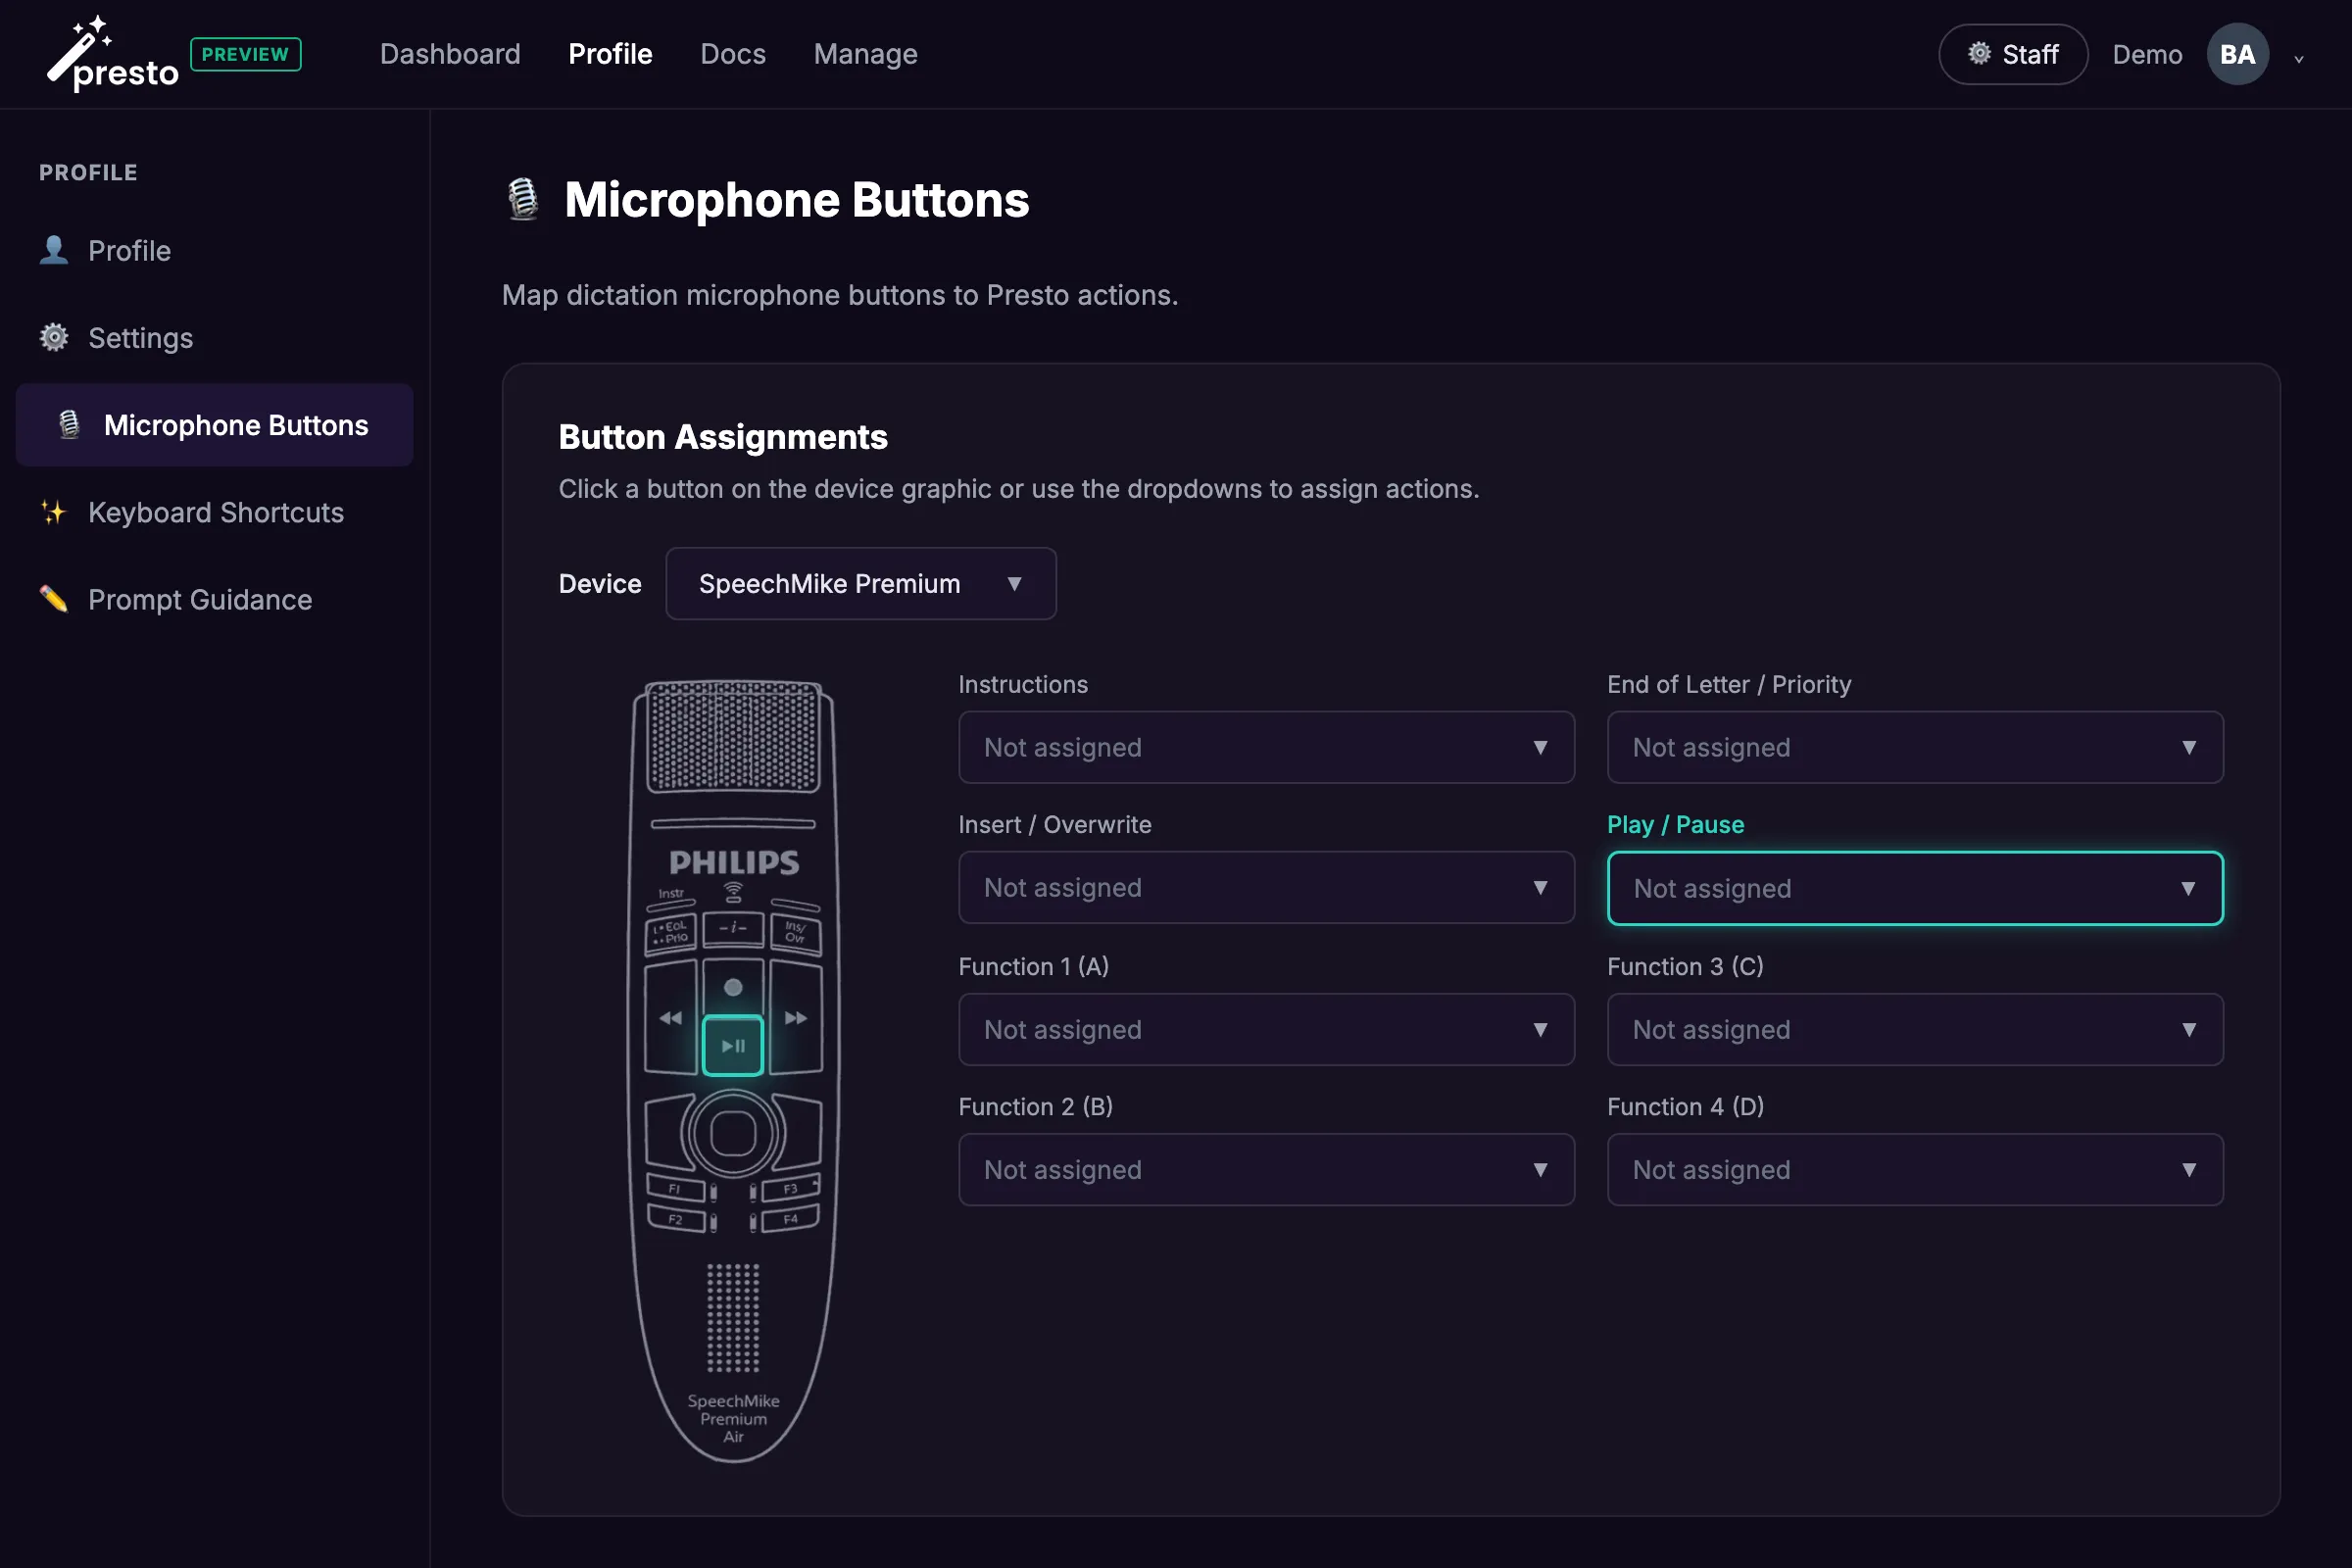
Step 3: Assign actions
Section titled “Step 3: Assign actions”Click a button on the device graphic or use the dropdown. These actions are available:
- Merge Findings — merges current findings into the report
- Refresh AI Findings — re-fetches the latest AI-generated findings for the current study. Only useful in enterprise deployments where AI findings (e.g., from a vision-language model) populate the findings panel automatically.
- Toggle Findings Only — opens or closes the findings panel in PowerScribe
- Capture Region (
capture.region) — starts a Presto Capture region pick, pre-filled with your last region when one is remembered - Capture Window (
capture.window) — starts a Presto Capture window pick - Repeat Last Capture (
capture.recapture) — re-grabs your last captured area without re-selecting - Custom Command — runs a Custom Command you’ve defined. Your saved commands appear here by name.
- Not assigned — button does nothing in Presto (default)
A common starting configuration:
| Button | Action |
|---|---|
| Transcribe or Function 1 | Toggle Findings Only |
| Enter/Select | Merge Findings |
Assign a second action with tap and hold
Section titled “Assign a second action with tap and hold”Each button can carry two actions: a tap action and a separate press-and-hold action. This lets one button do double duty — for example, tap to merge findings, hold to refresh them.
To add a hold action:
- Under the button, click + Add hold action. A Hold sub-action appears nested beneath the button.
- Choose the action for the hold from its dropdown — the same four actions are available.
Presto decides between the two on release: a quick press fires the tap action, while holding for about 0.6 seconds before releasing fires the hold action. To go back to a single action, click Remove next to the Hold label.
Buttons with only one action assigned are unchanged — they fire on press as before.
Step 4: Clear button conflicts in PowerScribe
Section titled “Step 4: Clear button conflicts in PowerScribe”For any button you assign in Presto, PowerScribe must not have its own action on that same button — otherwise PowerScribe intercepts the press first.
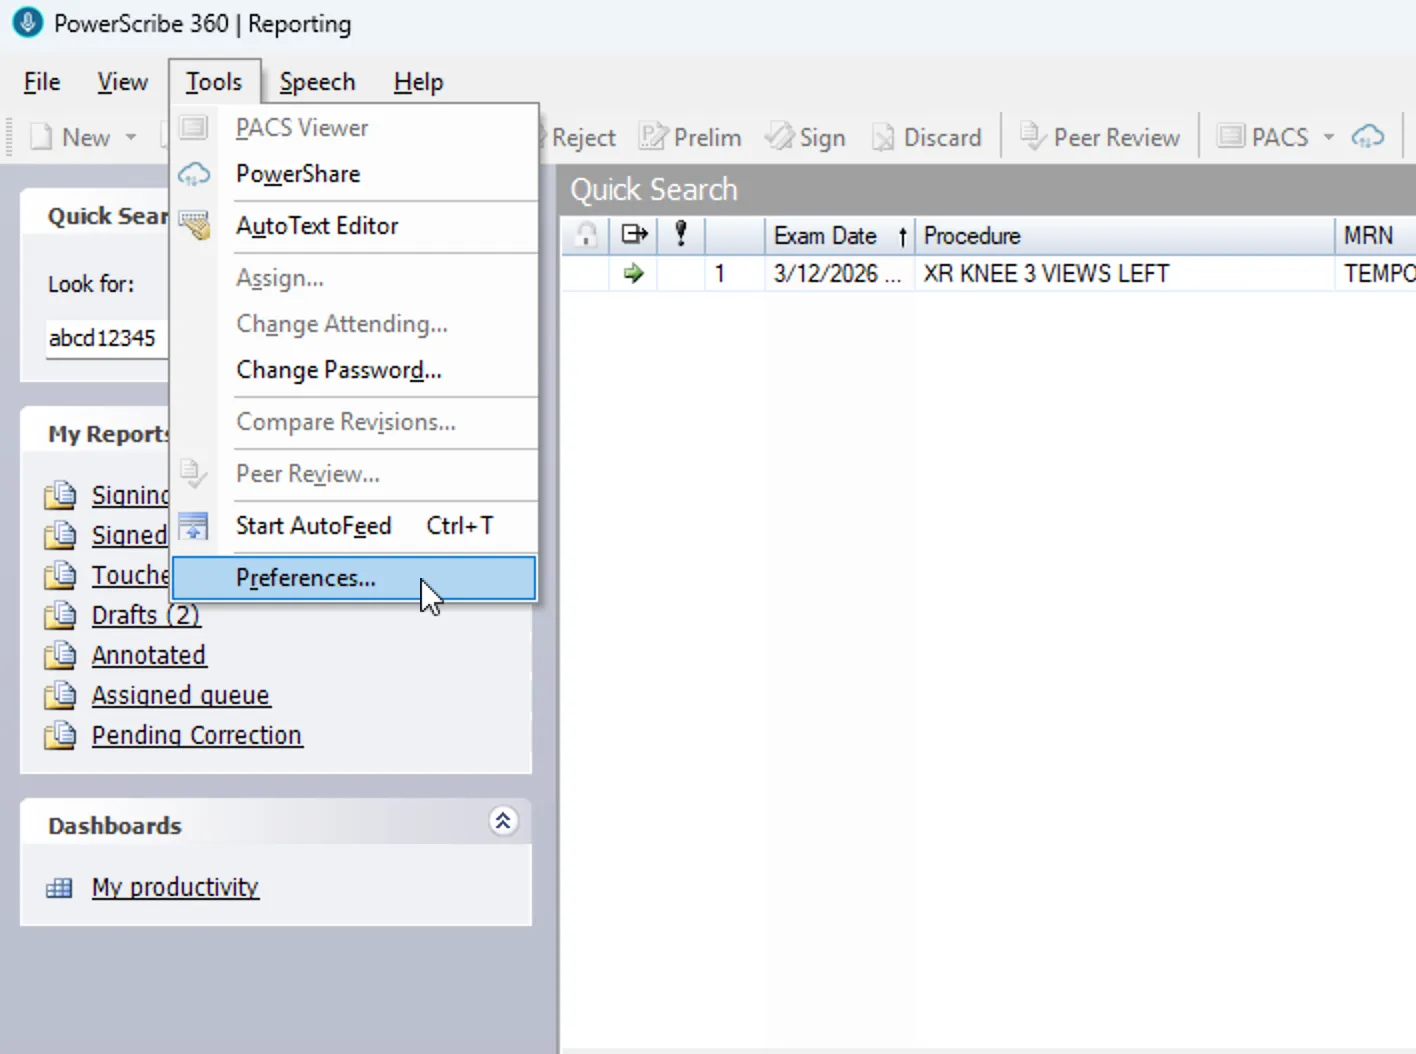
Open PowerScribe Preferences. The menu location depends on your version:
-
PowerScribe 360 — go to Tools → Preferences.
-
PowerScribe One 2023 — click the dropdown menu next to the Help menu in the top-right corner, then choose Preferences.
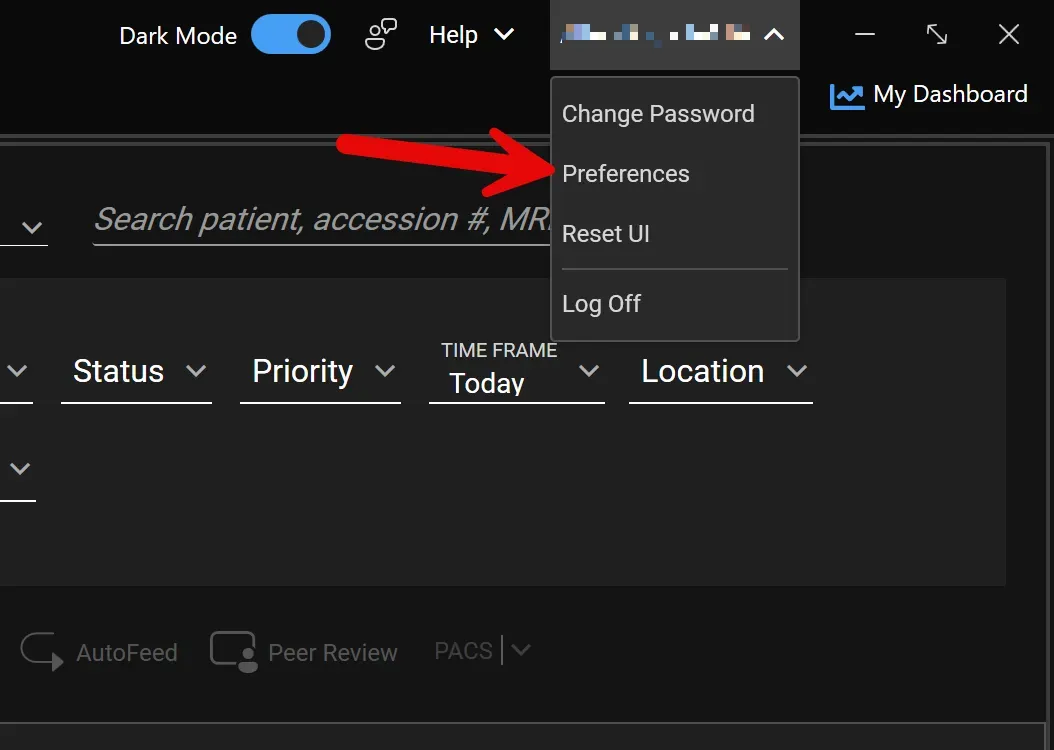
Select PowerMic in the left sidebar and change each button you plan to use:
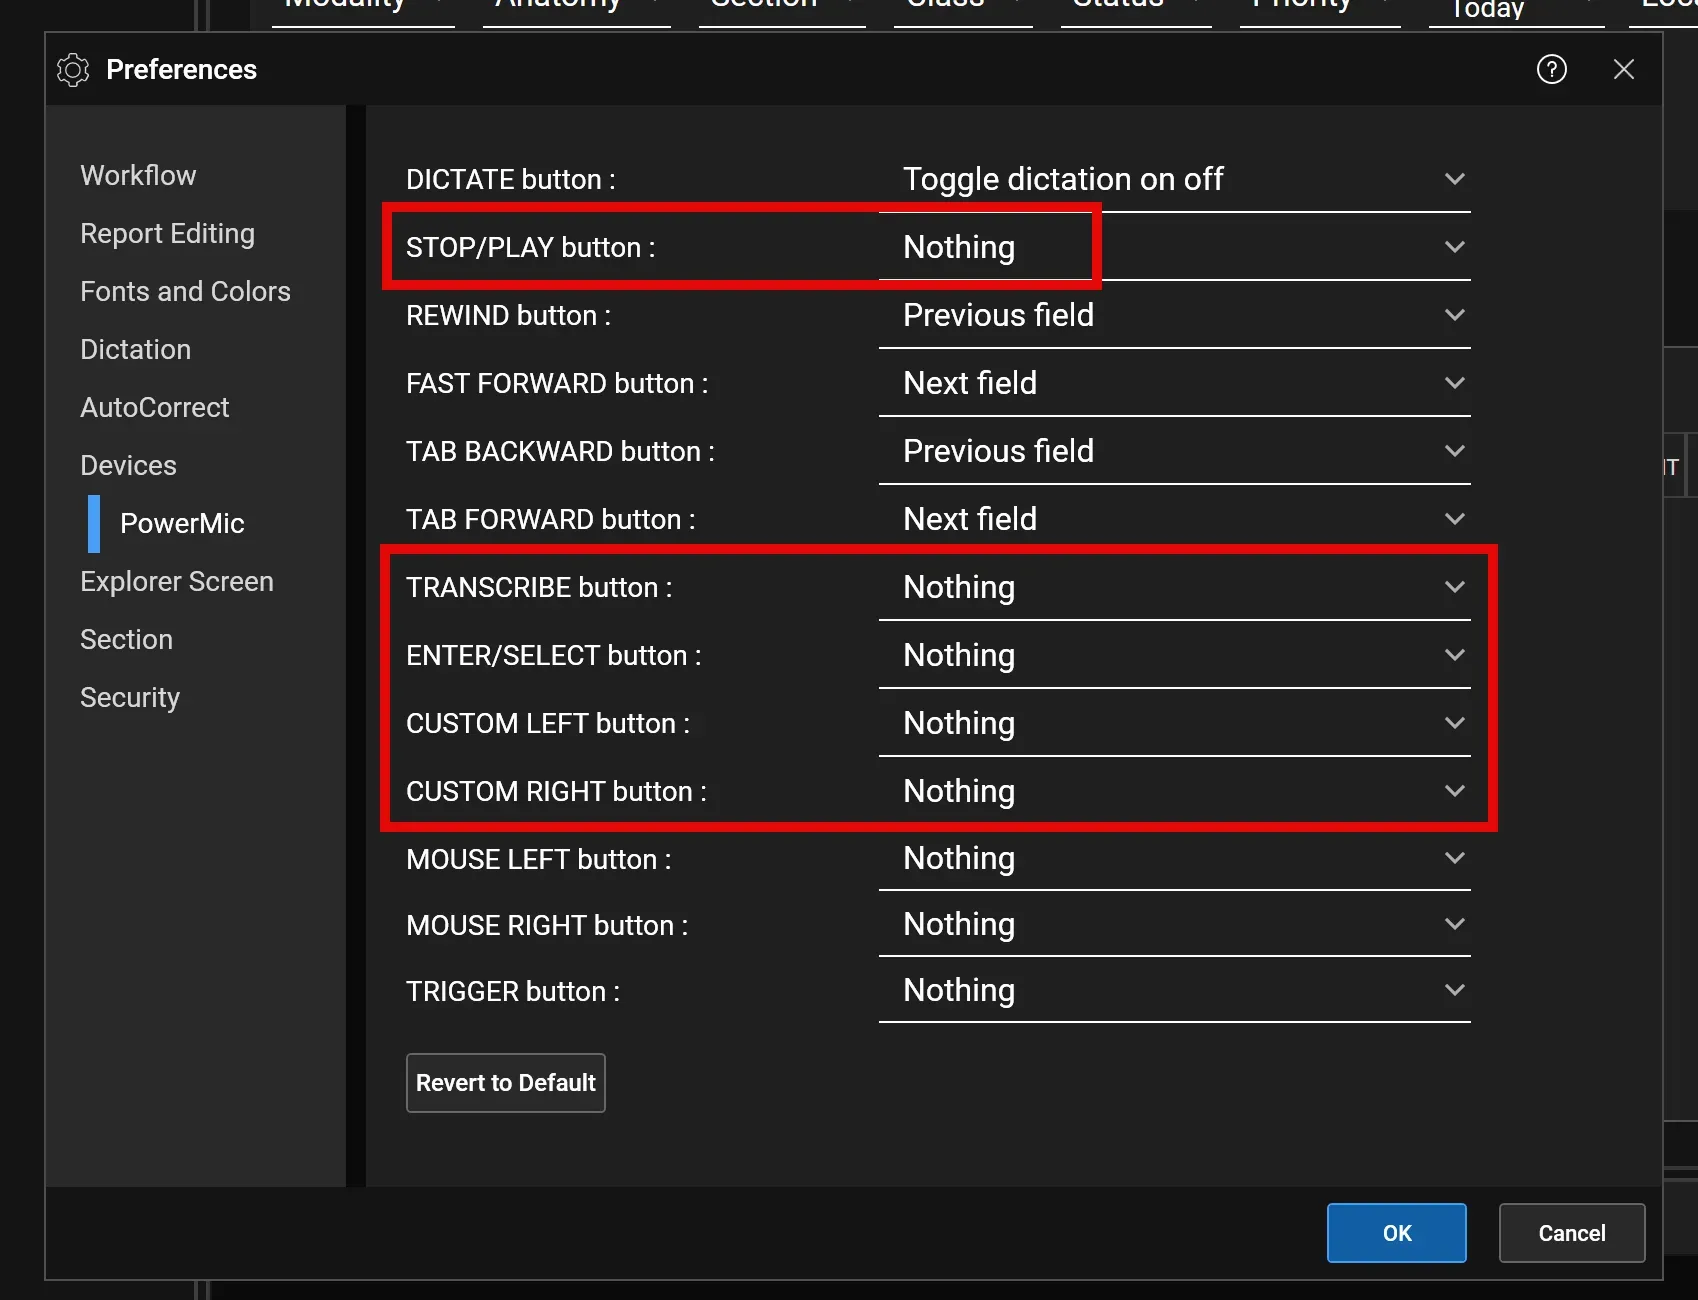
- Set the button to Nothing
- Exception: Stop/Play cannot be set to Nothing in PowerScribe — use Deadman play audio instead (a quick press still triggers the Presto action)
Click OK to save.
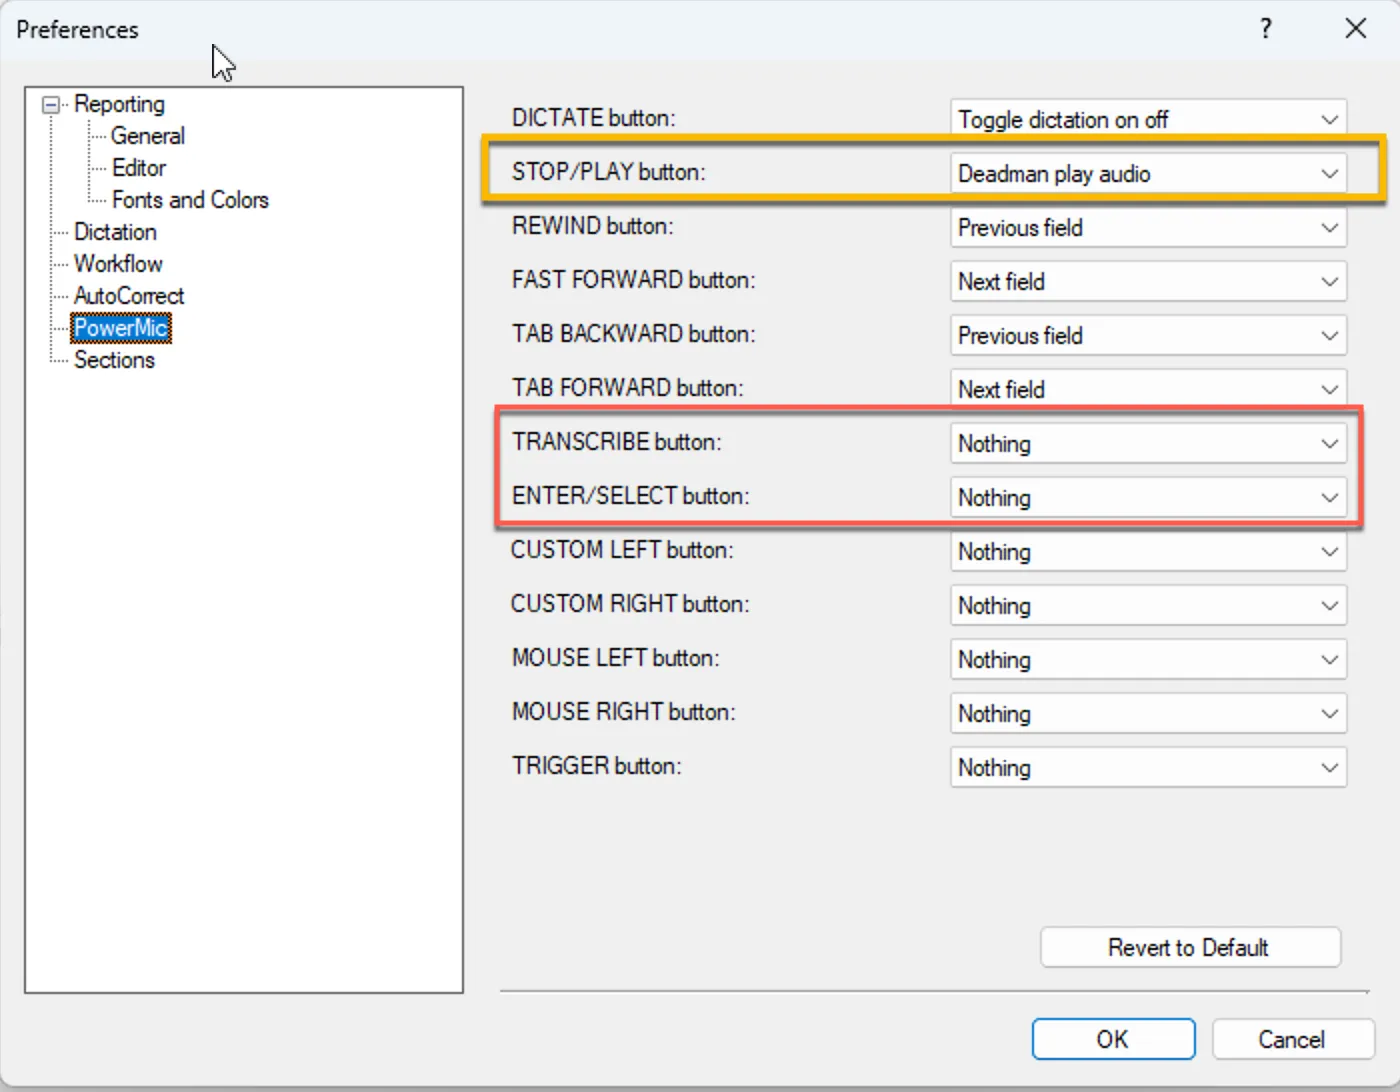
In PowerScribe One 2023 the same PowerMic settings look like this:
Step 5: Save and test
Section titled “Step 5: Save and test”Click Save Mappings. Changes apply immediately — no restart required.
To test:
- Open a draft report in PowerScribe
- Press your Toggle Findings Only button — the findings panel should open
- Dictate some test findings, then press your Merge Findings button — Presto should begin the merge
If a button doesn’t respond:
- Verify the button was cleared in PowerScribe Preferences (Step 4)
- Confirm Presto shows Ready with a green link icon in the status bar
- Check that your microphone is connected and recognized by the system
Keyboard Shortcuts
Section titled “Keyboard Shortcuts”Step 6: Open the Keyboard Shortcuts page
Section titled “Step 6: Open the Keyboard Shortcuts page”Select Keyboard Shortcuts from the sidebar. This lets you trigger Presto actions with keyboard combinations instead of (or in addition to) microphone buttons.
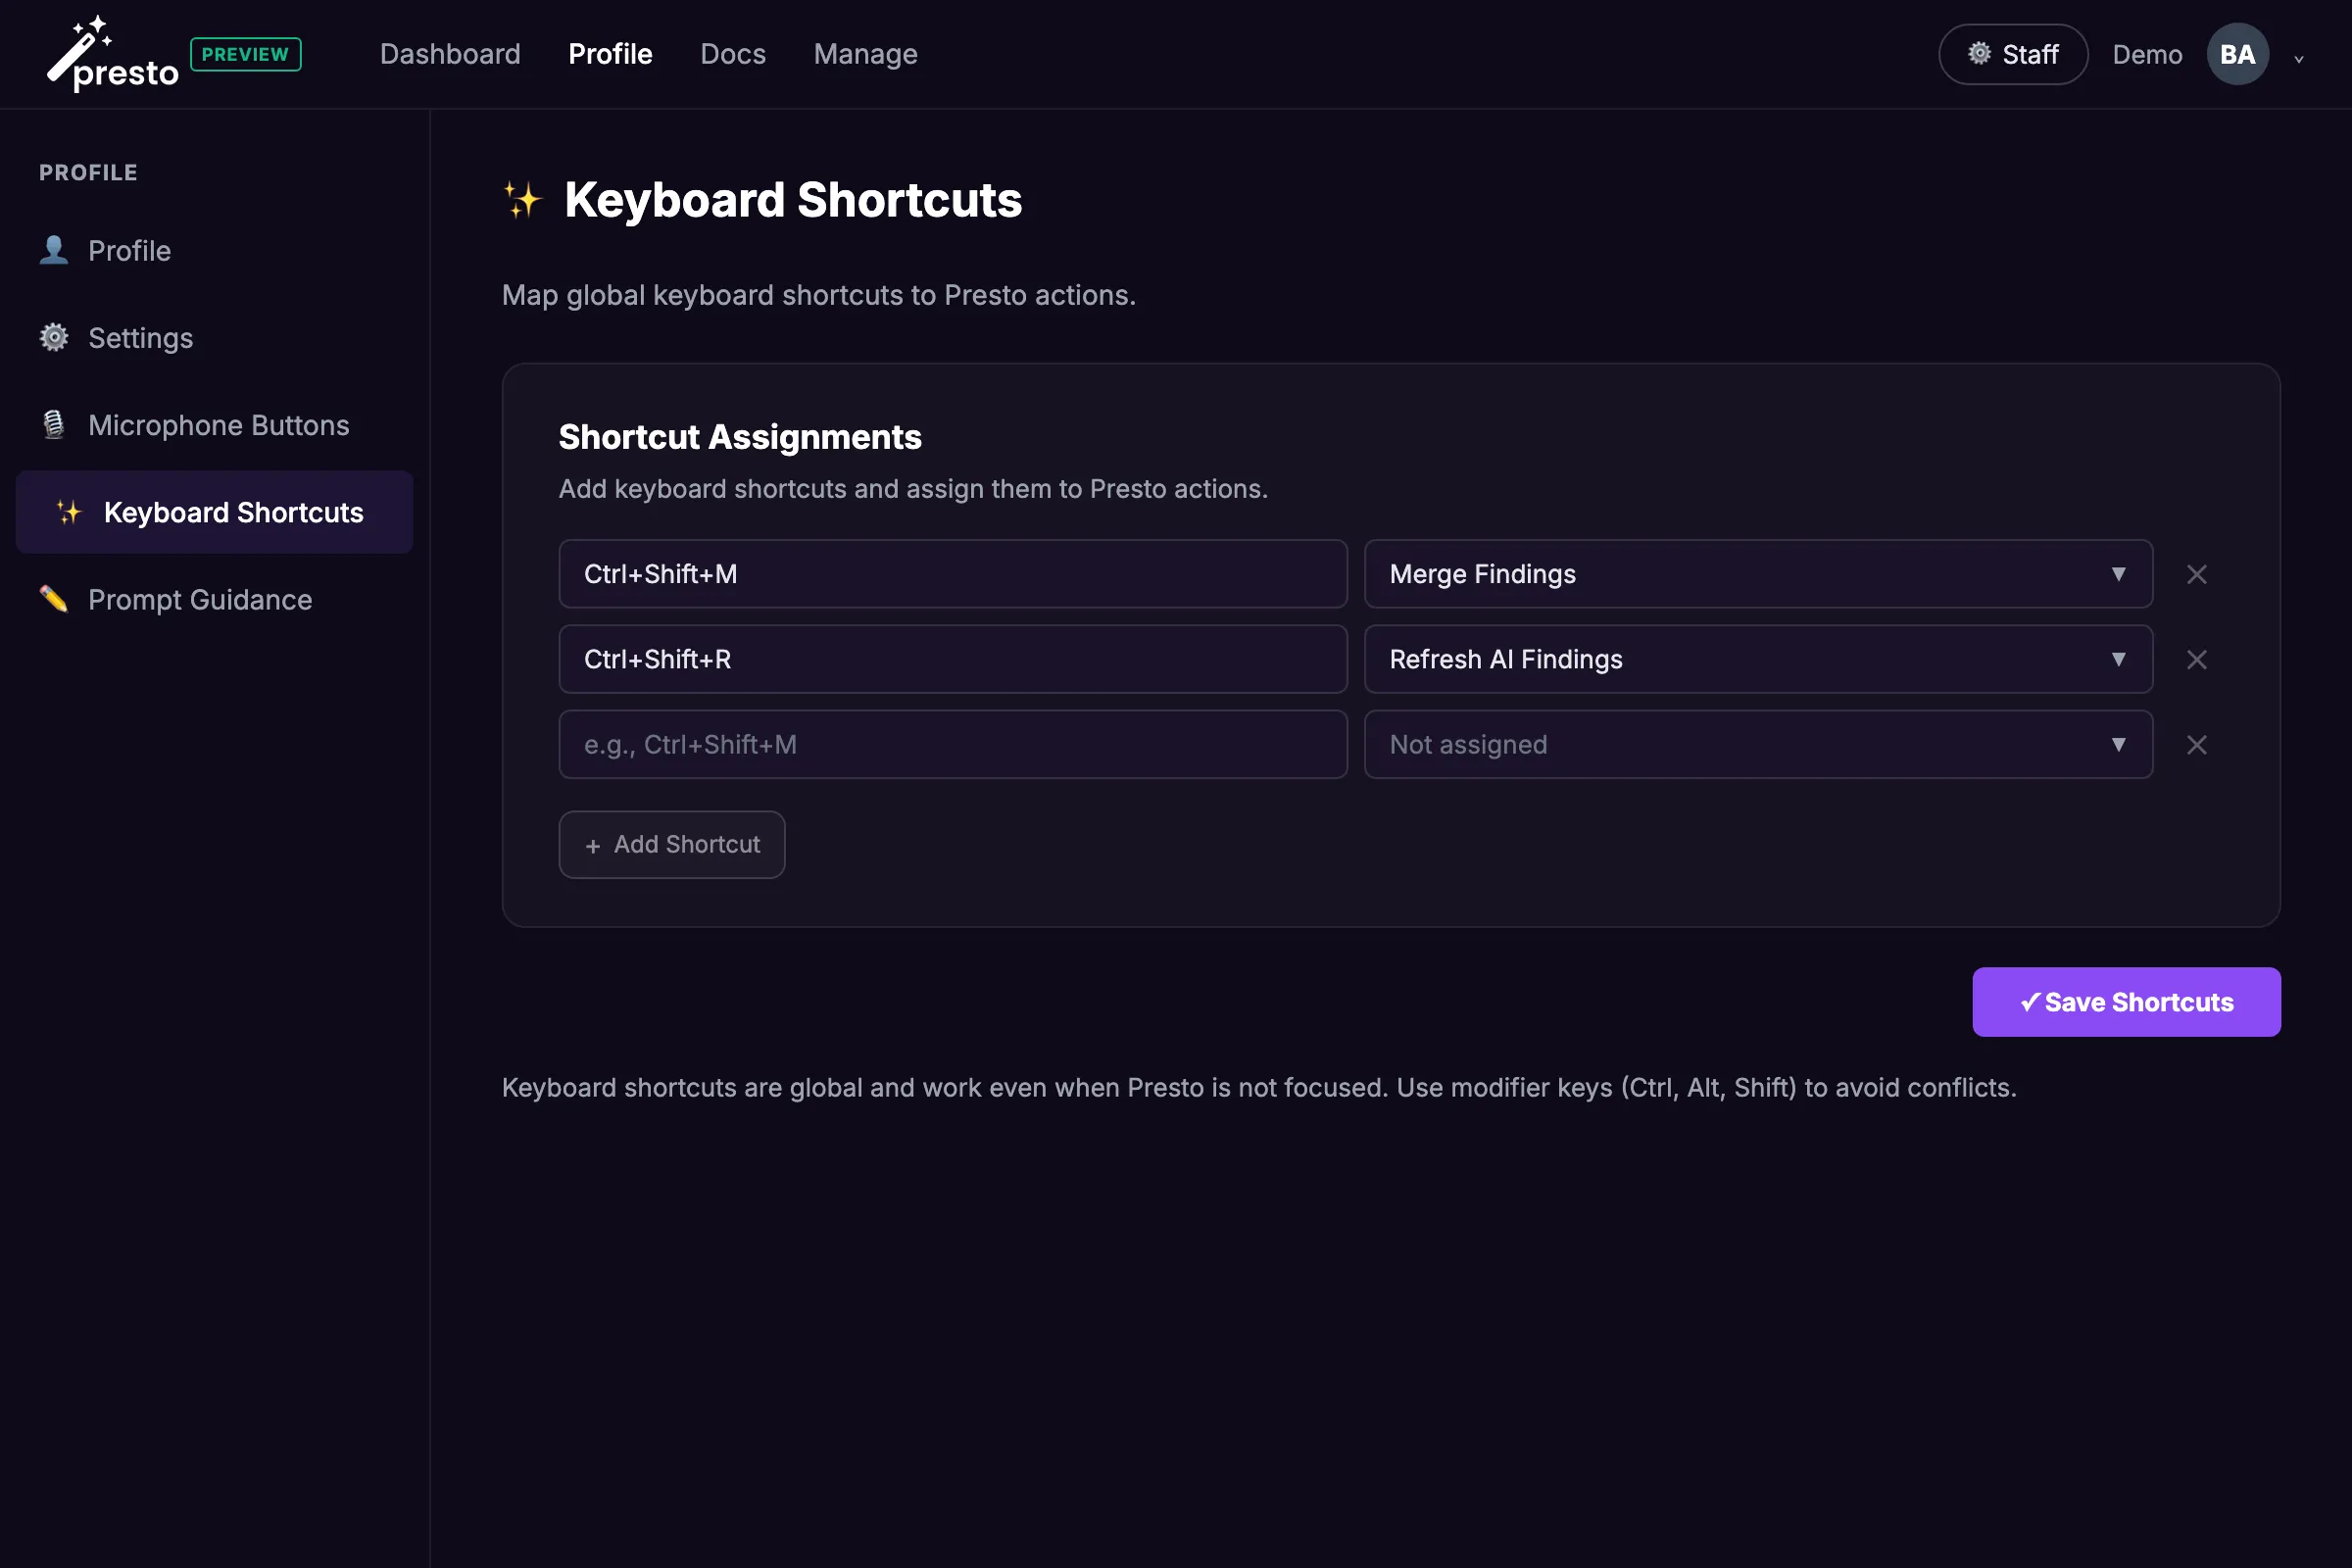
Step 7: Add a shortcut
Section titled “Step 7: Add a shortcut”Click Add Shortcut. Enter a key combination (e.g., Ctrl+Shift+M) and select an action from the dropdown. The same actions listed in Step 3 are available, including any Custom Command you’ve defined. To remove a shortcut, click the ✕ next to it.
Keyboard shortcuts are global — they work even when Presto is not the focused window. Use modifier keys (Ctrl, Alt, Shift) to avoid conflicts with other applications.
Step 8: Save and test
Section titled “Step 8: Save and test”Click Save Shortcuts. Changes apply immediately. Test by pressing your shortcut while Presto is running and connected to PowerScribe.
Troubleshooting
Section titled “Troubleshooting”Changes aren’t reaching my workstation Presto receives settings over a live connection. If the widget shows a yellow or red status indicator, try closing and reopening Presto.
PowerScribe still intercepts my button press Confirm the button is set to Nothing (or Deadman play audio for Stop/Play) in PowerScribe Preferences → PowerMic. PowerScribe must be restarted after changing its preferences.
My device isn’t listed Contact your Presto rep.