Presto Anywhere
Presto Anywhere lets you dictate findings directly into a dedicated field in your PowerScribe template. Presto automatically extracts those findings and merges them into your report — the same result as using the Findings panel, but without needing to open and close the panel.
This is useful when you prefer to stay entirely within the PowerScribe reporting window and quickly jump back and forth between other fields.
Set up the Presto Findings field
Section titled “Set up the Presto Findings field”The way you create the field depends on your PowerScribe version. Follow the PowerScribe 360 steps or the PowerScribe One steps, then continue to Use Presto Anywhere.
PowerScribe 360
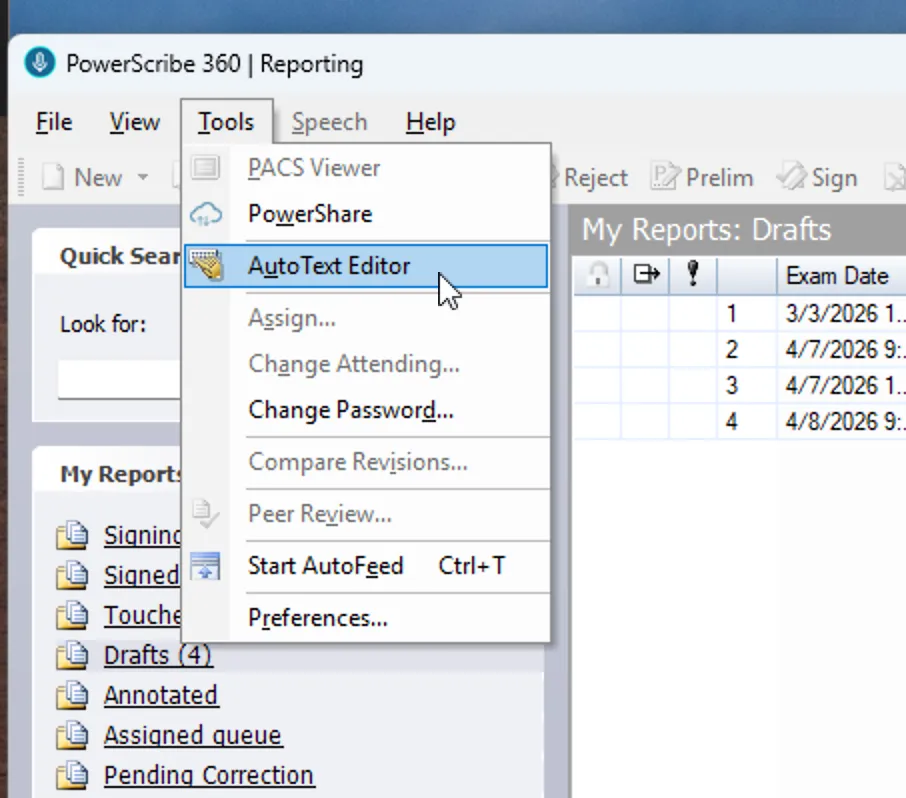
Section titled “PowerScribe 360”Step 1: Open the AutoText Editor
Section titled “Step 1: Open the AutoText Editor”In PowerScribe 360, go to Tools → AutoText Editor.
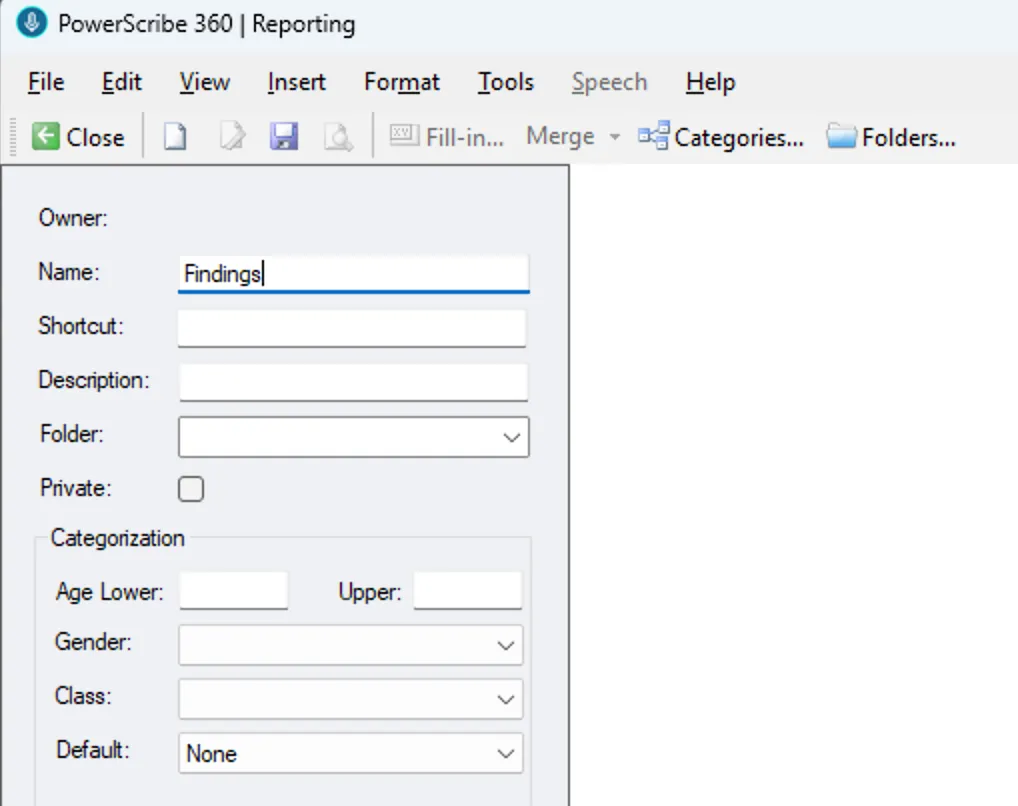
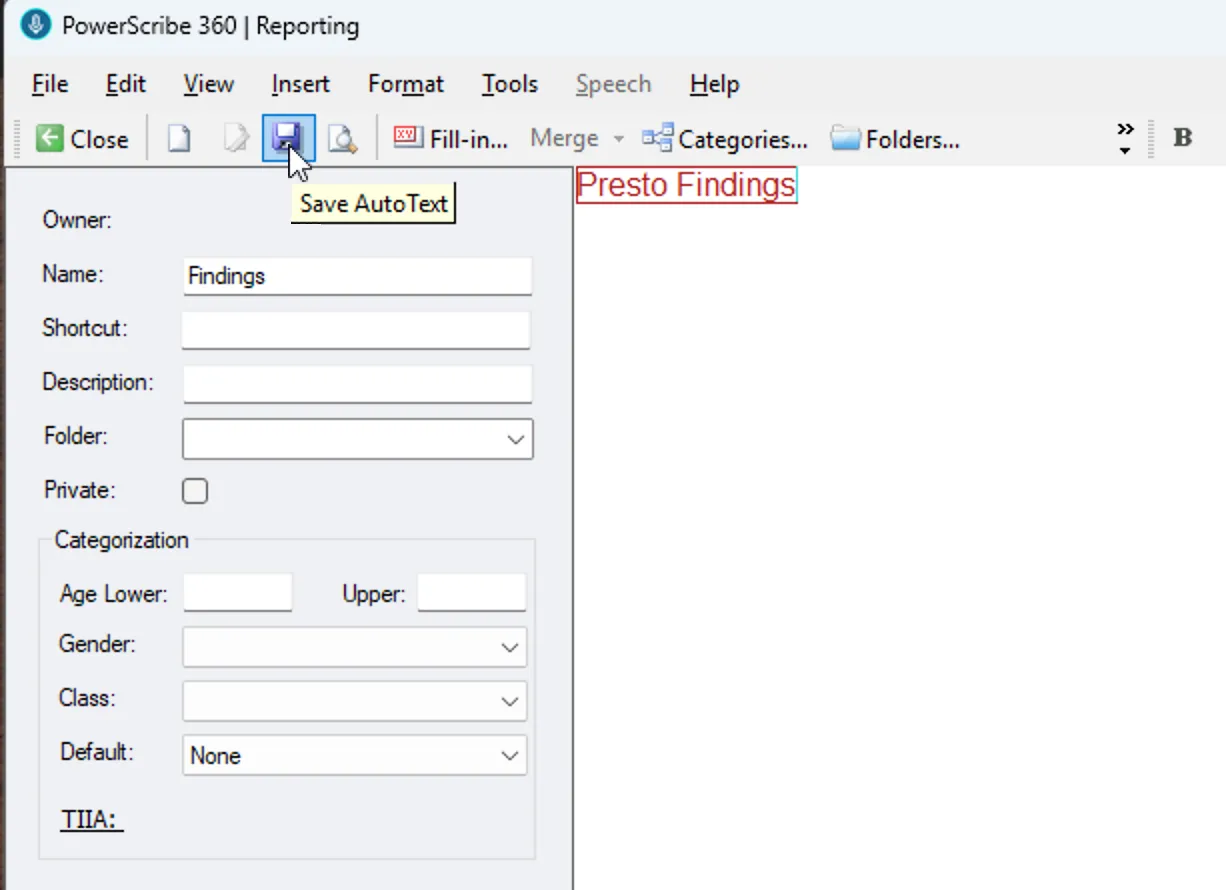
Step 2: Create a new AutoText
Section titled “Step 2: Create a new AutoText”Create a new AutoText and name it Findings (or any name you prefer). This AutoText will hold the fill-in field that Presto reads from. We recommend naming it something easy to invoke by voice command.
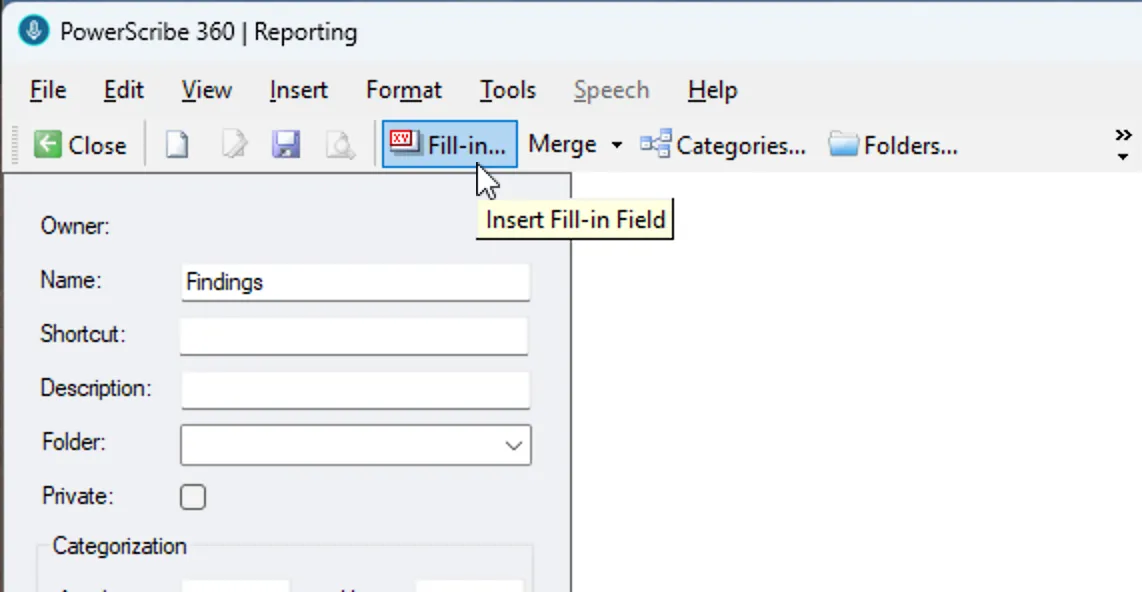
Step 3: Insert a Fill-in Field
Section titled “Step 3: Insert a Fill-in Field”Click the Fill-in… button in the toolbar to insert a fill-in field into the AutoText.
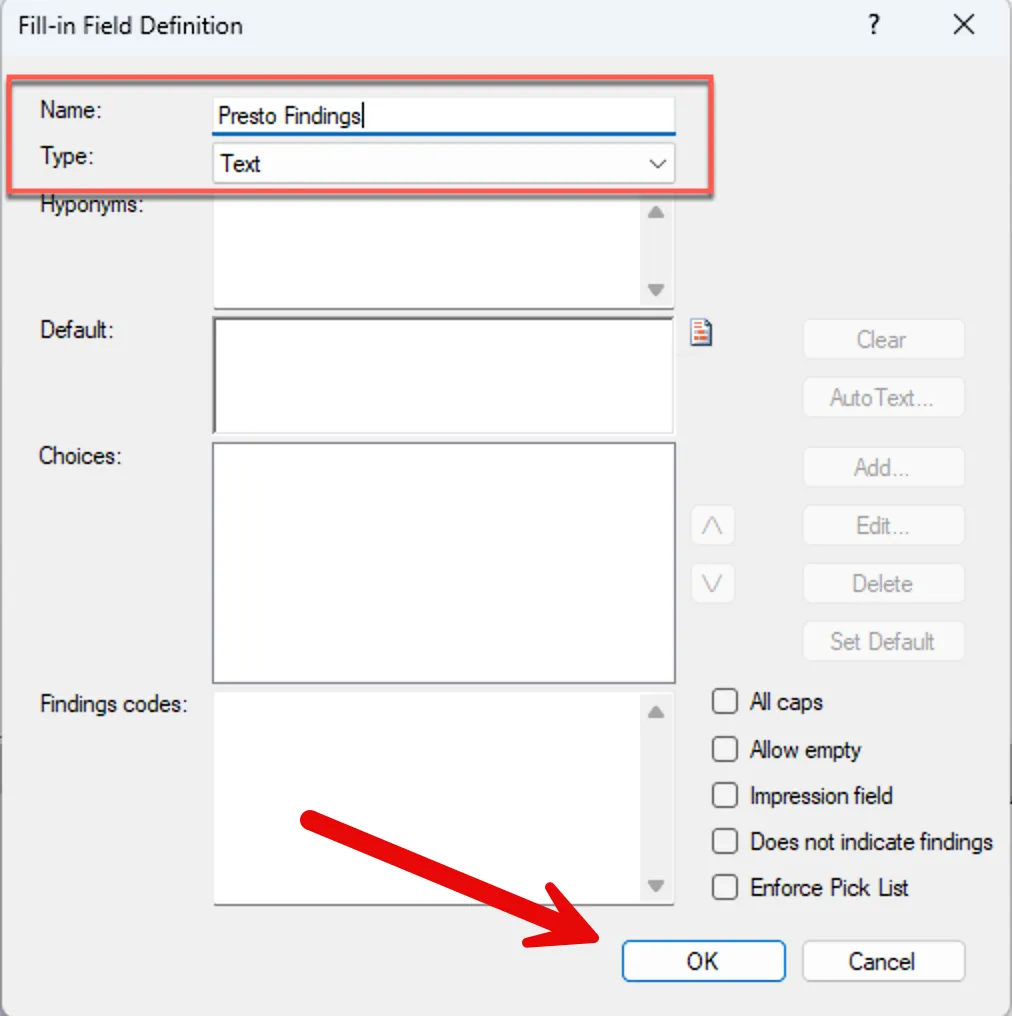
Step 4: Name the field “Presto Findings”
Section titled “Step 4: Name the field “Presto Findings””In the Fill-in Field Definition dialog, set:
- Name:
Presto Findings - Type: Text
Click OK to insert the field.
Step 5: Save the AutoText
Section titled “Step 5: Save the AutoText”Click Save AutoText to save. The AutoText now contains your Presto Findings field and is ready to use in any template.
PowerScribe One
Section titled “PowerScribe One”The Presto Findings field you created in PowerScribe 360 may not transfer to PowerScribe One. If it didn’t, recreate it here.
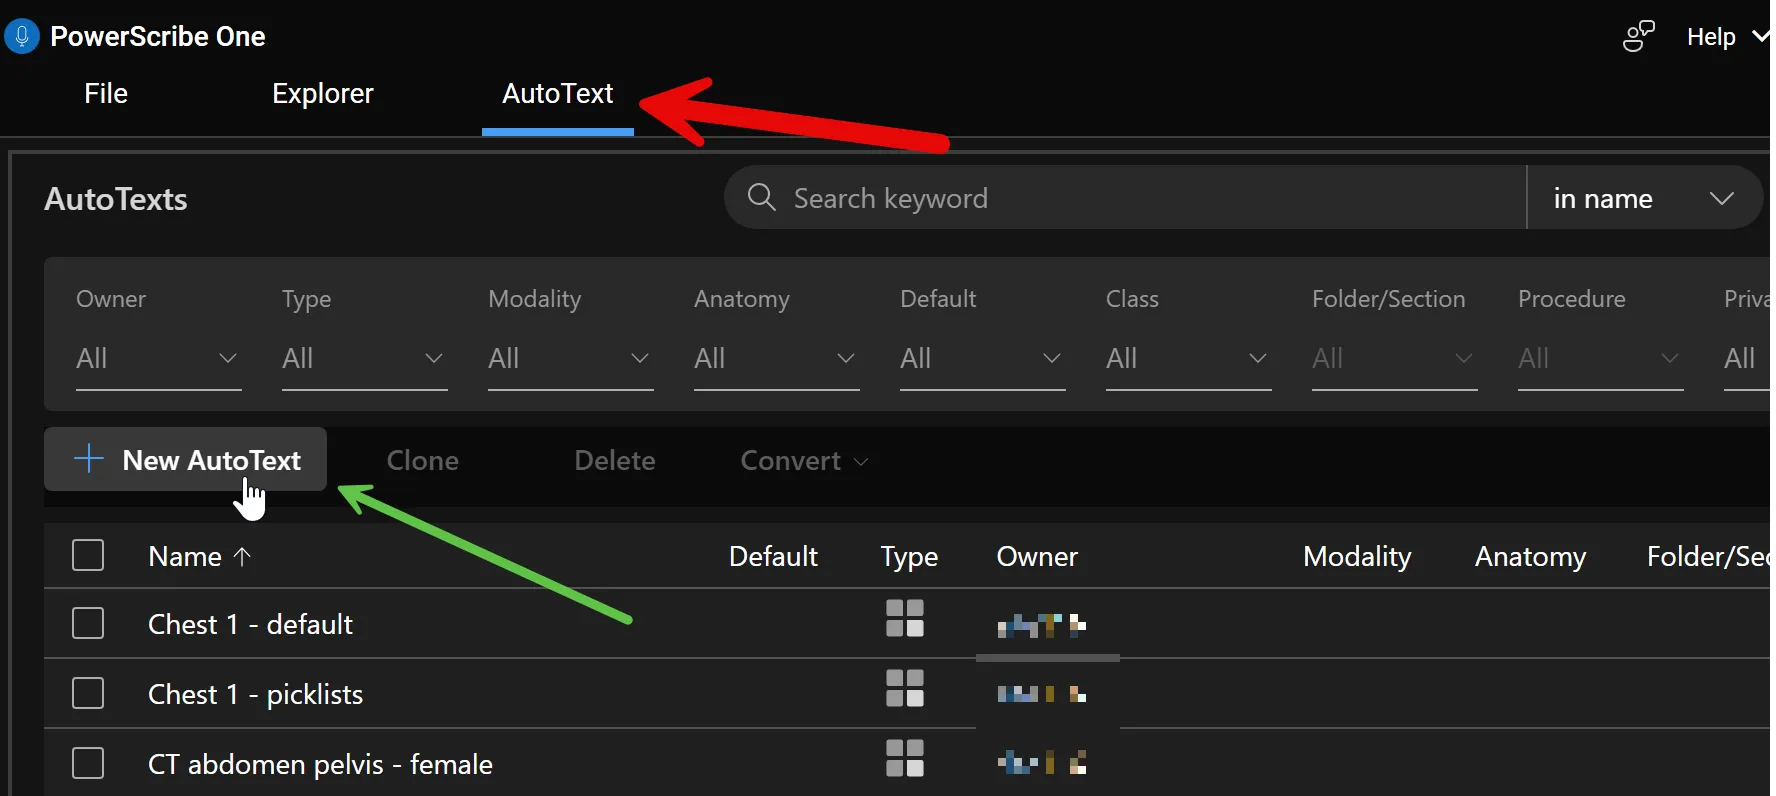
Step 1: Create a new AutoText
Section titled “Step 1: Create a new AutoText”In PowerScribe One, open the AutoText tab and click + New AutoText.
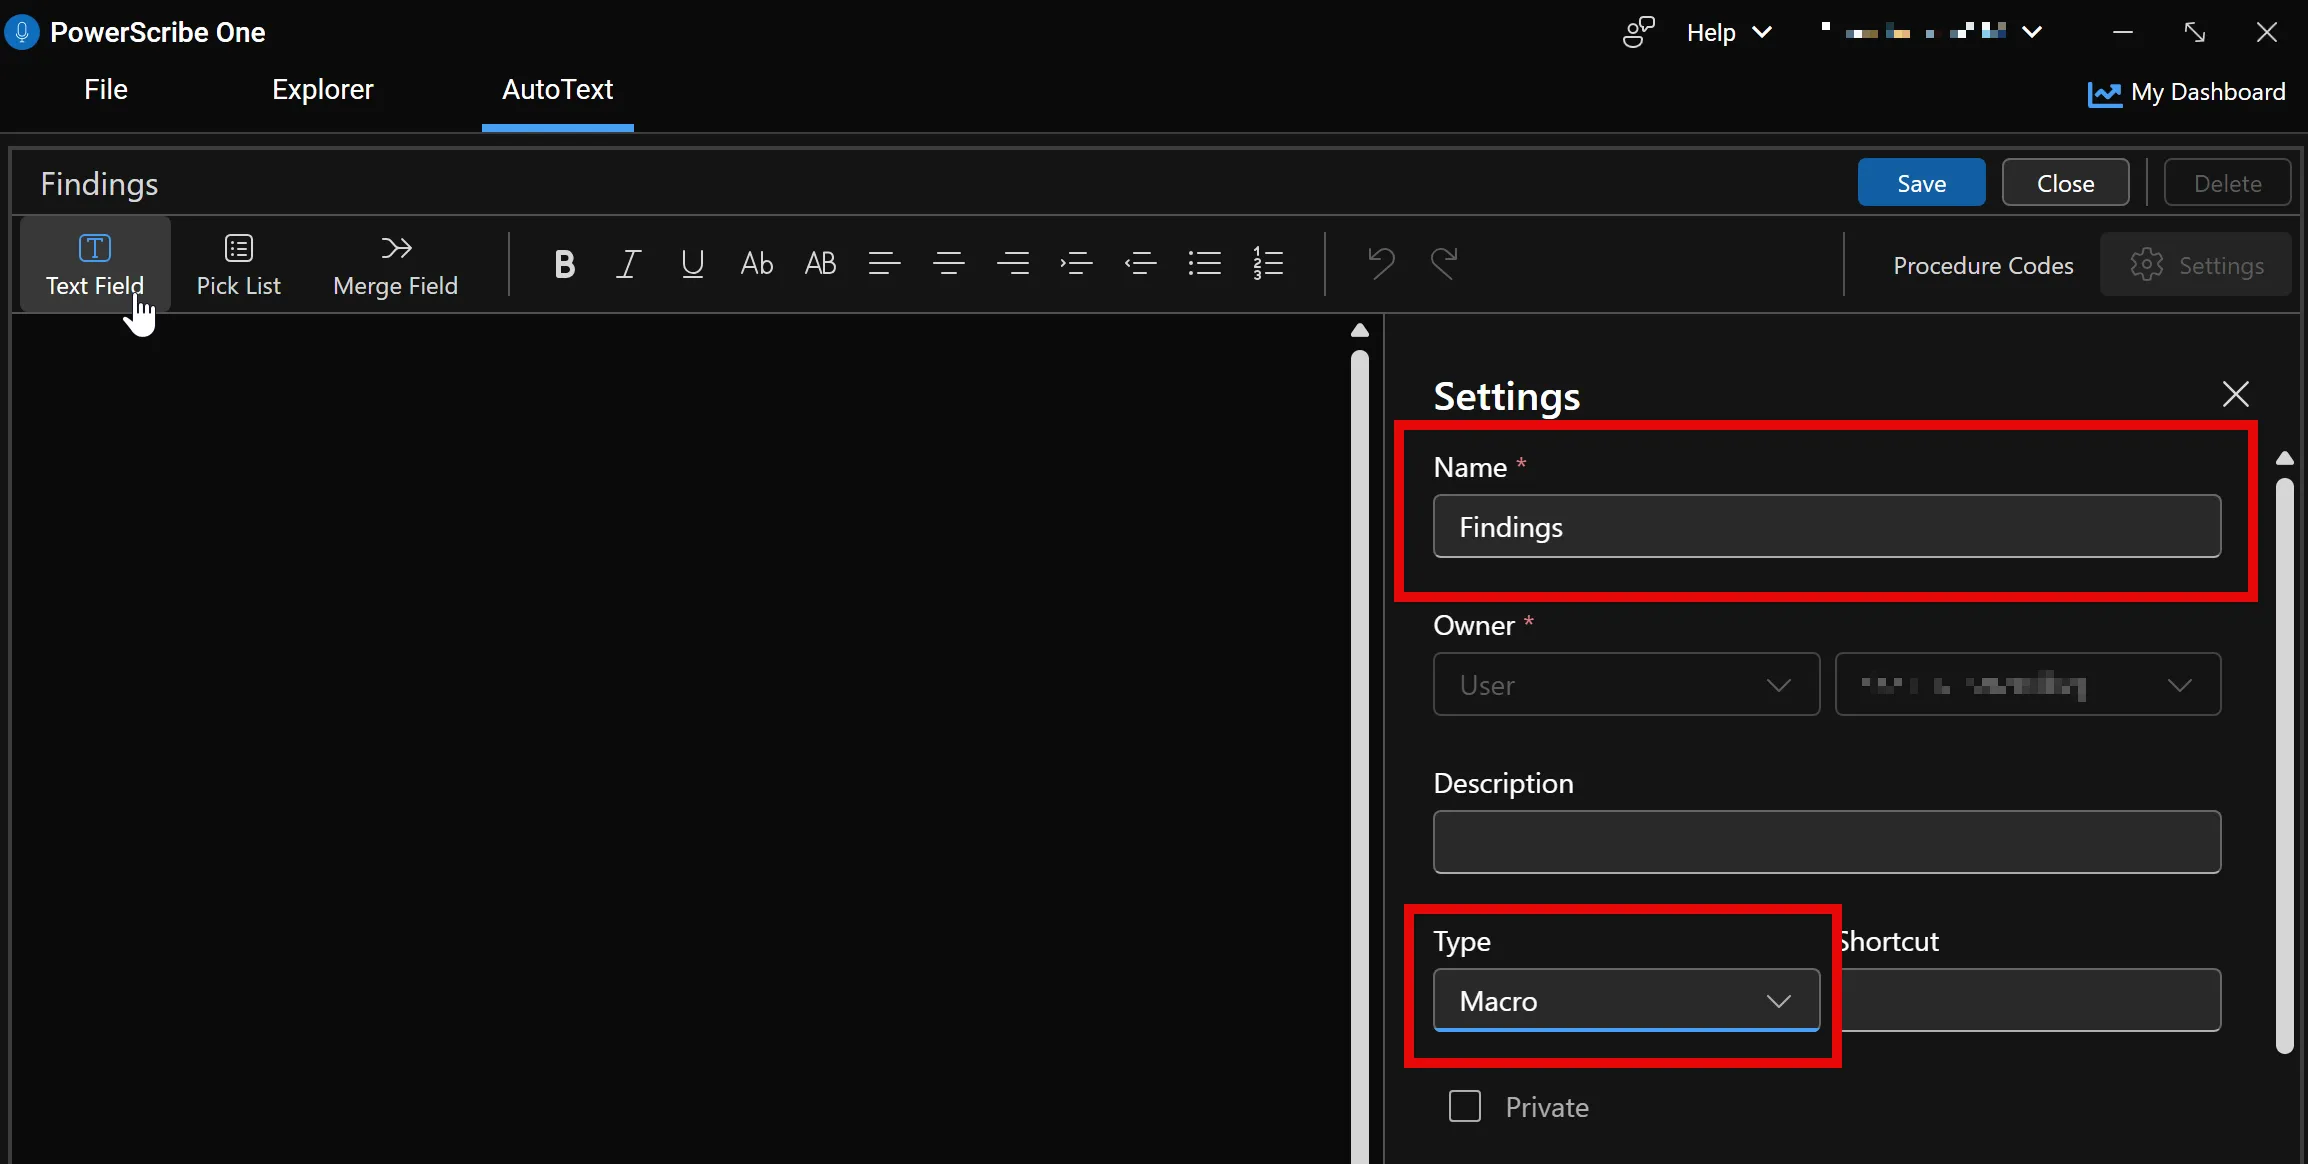
Step 2: Name the AutoText and set the type
Section titled “Step 2: Name the AutoText and set the type”In the Settings panel, set:
- Name:
Findings(or any name you prefer — choose something easy to invoke by voice) - Type:
Macro
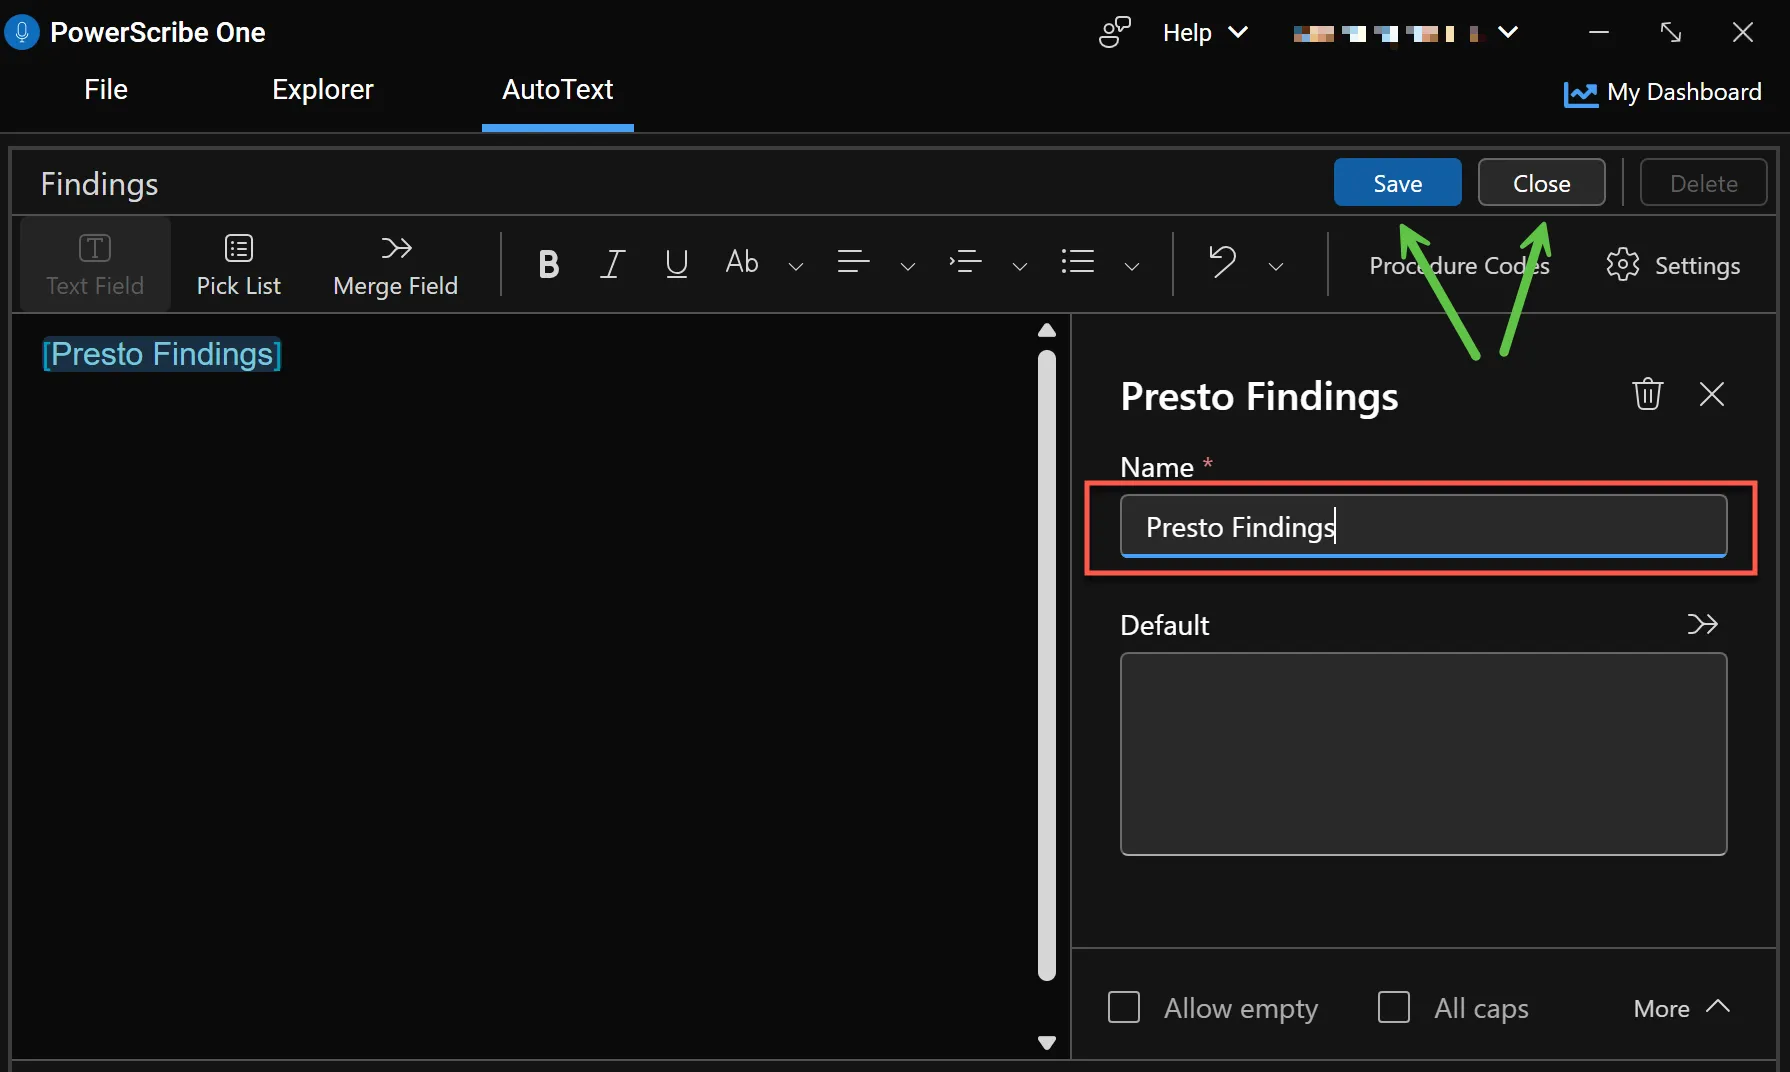
Step 3: Add the Presto Findings field
Section titled “Step 3: Add the Presto Findings field”In the AutoText editor, click Text Field in the toolbar to insert a fill-in field. In the field’s settings, set the Name to Presto Findings, then click Save.
Use Presto Anywhere
Section titled “Use Presto Anywhere”Once the Presto Findings field exists, the workflow is the same on either PowerScribe version.
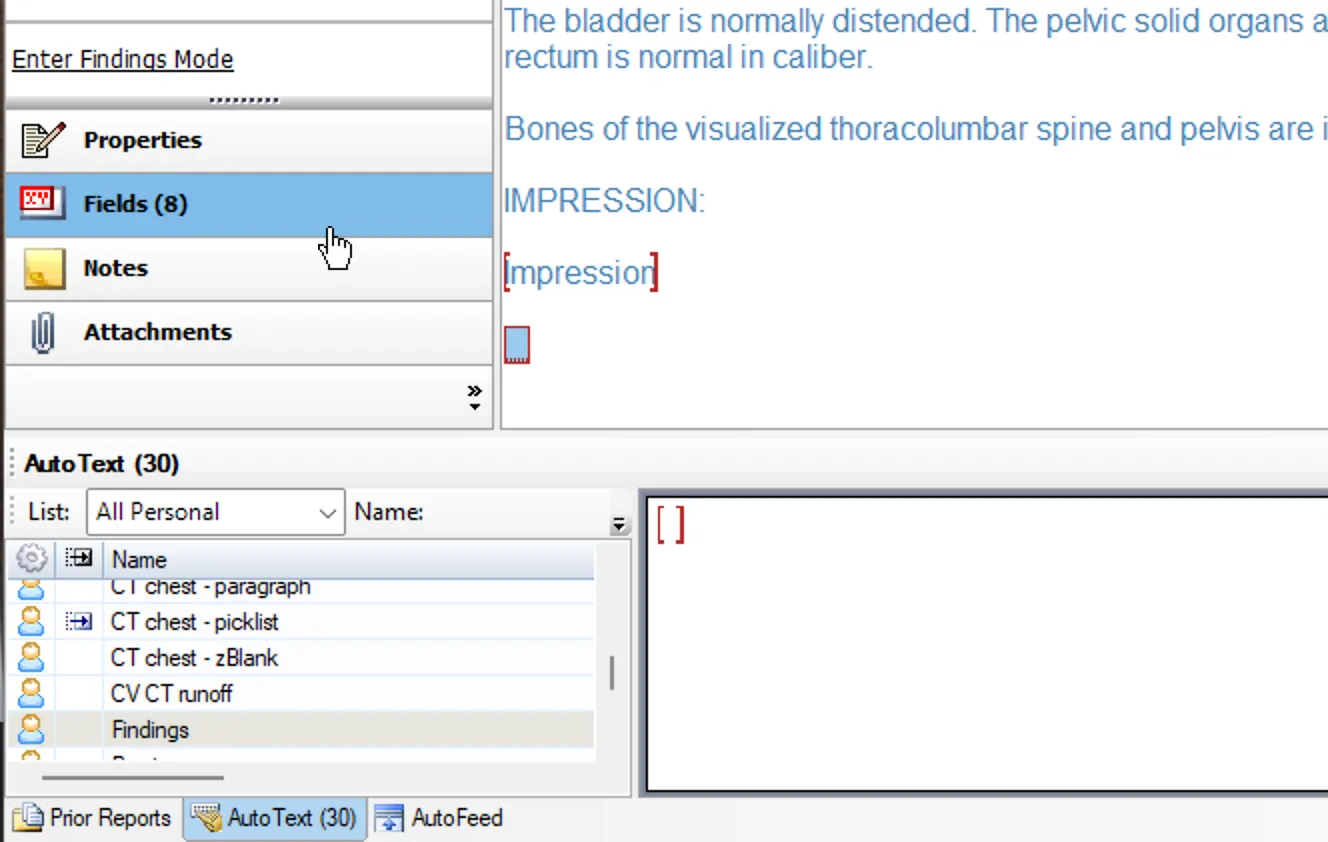
Step 1: Add the AutoText to your template
Section titled “Step 1: Add the AutoText to your template”Insert the Findings AutoText into your report template. Most users will insert this at the end of the report; however, you can insert the Findings AutoText field anywhere in your report, as long as it is not inside another field.
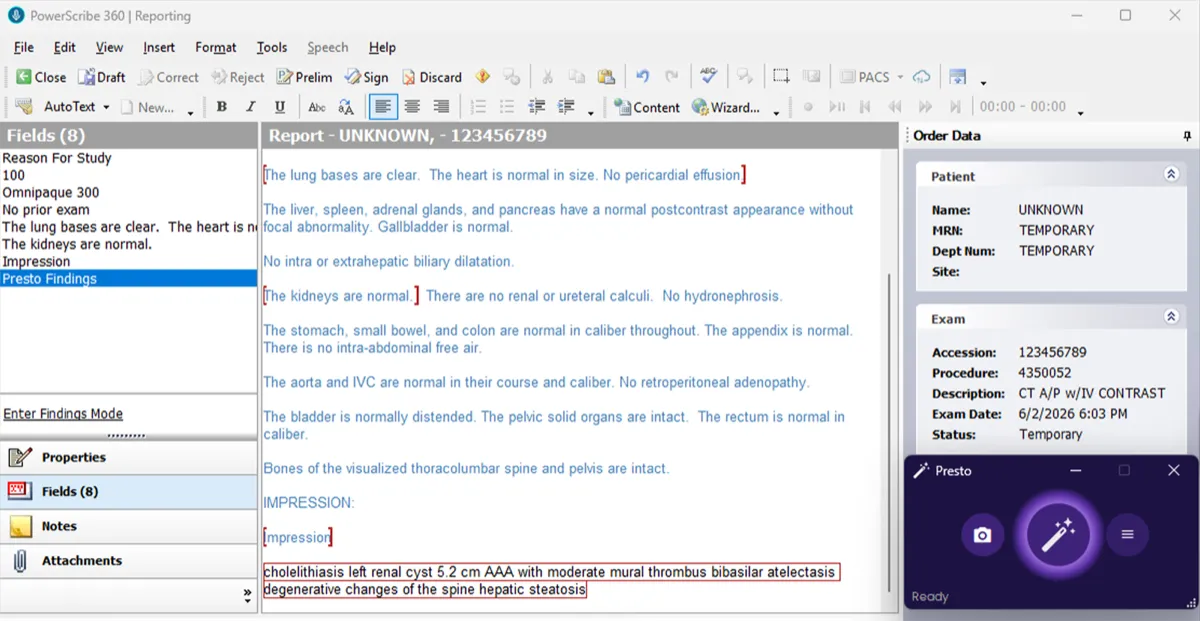
Step 2: Dictate your findings
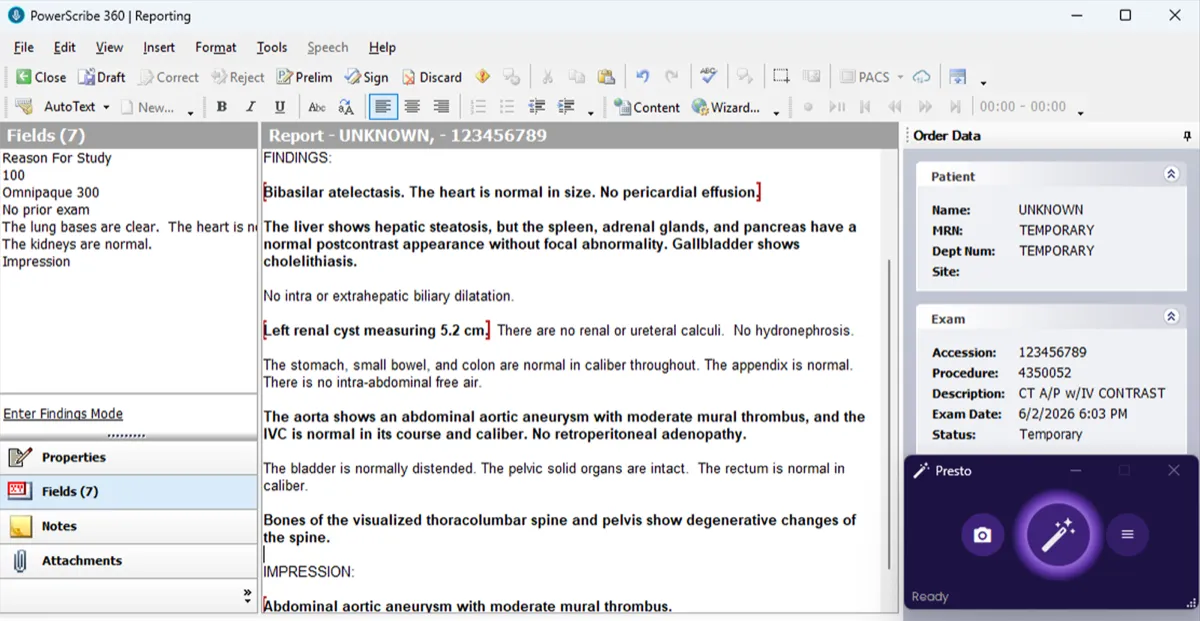
Section titled “Step 2: Dictate your findings”Open a report and dictate or type your findings directly into the Presto Findings field. You can enter them in any format — prose, keywords, or terse shorthand — just as you would in the Presto panel. No punctuation, capitalization, or other formatting is required.
When you’re ready, click the merge button in the Presto widget (or use your microphone shortcut or keyboard shortcut).
Step 3: Review the merged report
Section titled “Step 3: Review the merged report”Presto extracts your findings from the Presto Findings field, routes them into the correct template fields, and generates an impression — exactly as if you had used the Presto panel.